
This is a guide on how to deploy WordPress (or any other container-based service) on ORACLE Cloud and set up a URL with a Dynamic DNS provider. You could use the guide for a Teamspeak or Minecraft server as well. We’ll use a free-tier ARM-based VM, which utilizes their Ampere Altra 80C CPU. The free-tier allows you to use 4 CPU cores and 24GB of RAM in total. This can be split between multiple VMs, such as 2/1/1 cores with 12/6/6GB or RAM respectively. The bandwidth you get is 1Gb/s per core, so for a 2-core instance it’s doubled.
The guide is composed of four main parts:
- Setting up an OCI account and the VM
- Installing Docker and Docker compose with a management UI
- Installing WordPress in the Docker environment
- Setting up a domain name and an A record on HE’s free DNS servers
OCI (Oracle Cloud Infrastructure) uses Cloud Accounts, which is an ID for the cloud account and you can have multiple user IDs with their own email addresses and privilege levels associated to the Cloud Account. CAs are tied to a geographical region, in which you will be able to create the free-tier VMs. You will NOT be able to change this later (as of 2023).
Next, go to the compute instances page and click “Create instance”. On the next page, enter a name and click “edit” under the “Image and shape” section. Then change the shape to an “VM.Standard.A1.Flex” instance as shown below.
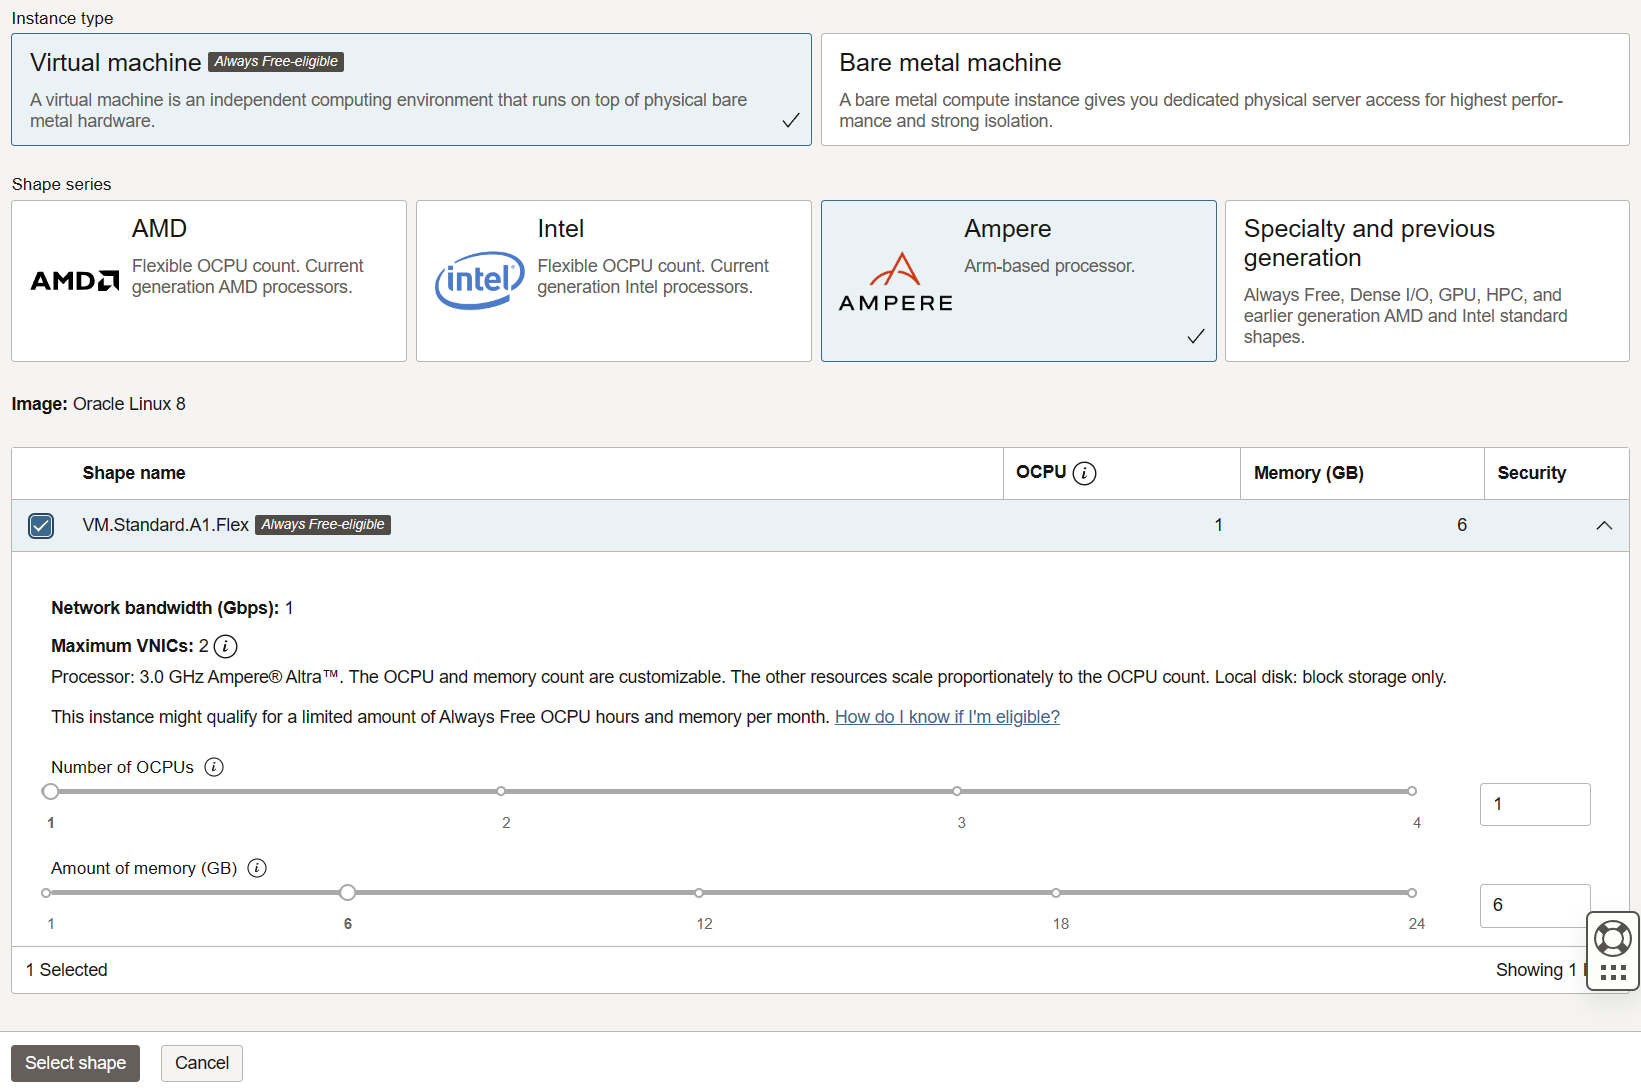
You can add more cores and memory, but I found that WordPress is quite happy with a single core and 6GB of RAM, so that’s what I used. Under the SSH keys section, you’ll have to save the private key, as that’s what you’ll use to SSH into the machine for setup. There are no passwords.
Under the “Boot volume” section, you can specify a custom size, the default is 46.4GB. In the free tier, you get a total of 400GB space across all of your boot volumes and backups. You can split that up however you you want, but I don’t think you would need more than the default, unless your site is pretty big or you’re planning to run other containers alongside WP in the same VM. Once you’re happy with the settings, click “Create”.
Now that we have a VM with Oracle Linux 8, we need to install Docker, Docker Compose and a test container.
The command blocks below are already prefixed with sudo for convenience. Exercise caution when copying and executing them in a live environment.
Then let’s begin. You’ve got the ssh .key file from when you created the VM and its public IP. To connect to it, use:
ssh -i <path_of_.ssh_file> opc@<public_ip>
You should now have a command prompt inside the VM. To update the OS, install Docker and Docker Compose, execute the below:
# update the packages
sudo dnf update -y
# add the Docker repo to the package manager
sudo dnf config-manager --add-repo=https://download.docker.com/linux/centos/docker-ce.repo
# install Docker
sudo dnf install docker-ce -y
# enable and start the service
sudo systemctl enable --now docker
# install the Docker Compose plugin, if necessary
sudo dnf install docker-compose-plugin
# enjoy
Now we should have everything up and running. To check the configuration, we can use sudo docker info and run a test container with sudo docker run hello-world. With this, Docker is ready to use.
If you don’t want to to use the sudo prefix for everything docker-related, add the ocp user to the docker group.
# create docker group, although it should already exist
sudo groupadd docker
# add the opc user to the group
sudo usermod -aG docker opc
# re-evaluate group memberships without logging out
newgrp docker
Let’s talk about Docker Compose. To avoid possible confusion, I would first like to mention that there are two variants of compose. There is Compose Standalone, which is used with the docker-compose command and there is the Compose plugin, which is a plugin for Docker. This requires the docker compose command. Note that the dash has been replaced with whitespace. This is what we’re using and we’ve already installed it in the code block above.
To install WordPress, we need to create a folder and inside that we need to add a file named docker-compose.yaml with the contents below:
version: "3.9"

services:
  db:
    image: mysql:latest
    volumes:
      - db_data:/var/lib/mysql
    restart: unless-stopped
    environment:
      MYSQL_ROOT_PASSWORD: somewordpress
      MYSQL_DATABASE: wordpress
      MYSQL_USER: wordpress
      MYSQL_PASSWORD: wordpress

  wordpress:
    depends_on:
      - db
    image: wordpress:latest
    volumes:
      - wordpress_data:/var/www/html
    ports:
      - "80:80"
    restart: unless-stopped
    environment:
      WORDPRESS_DB_HOST: db
      WORDPRESS_DB_USER: wordpress
      WORDPRESS_DB_PASSWORD: wordpress
      WORDPRESS_DB_NAME: wordpress
volumes:
  db_data: {}
  wordpress_data: {}
This contains all the data that Docker requires to create an environment for WordPress. If you’re curious about what the commands mean and how to tweak them, you can find a guide on wordpress.org.
Execute the docker compose up -d command in the folder containing the .yaml file and your stack should be up and running in a few seconds. Note that the website will not yet be accessible at this point.
You may receive an error such as the one below when attempting to start the stack: no matching manifest for linux/arm64/v8 in the manifest list entries. In this case, you can manually download the two images with docker pull wordpress and docker pull mysql. This will pull the linux/arm64/v8 variants of the images.
Next, we have to open the ports. Once on the VM’s firewall and once on the Virtual Cloud Network.
The firewall is very simple to update:
# open port 80 for TCP
sudo firewall-cmd --permanent --zone=public --add-port=80/tcp
# reload firewall settings
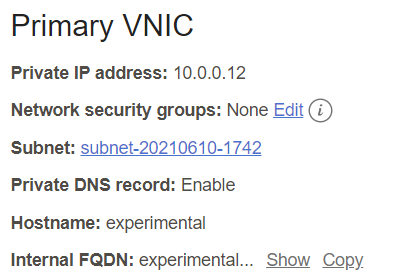
sudo firewall-cmd --reloadNext we need to set up something similar to a port forwarding rule on OCI. There is a subnet connected to the VNIC of our Compute Instance, which has a Security List that behaves very much like a firewall. We need to add an extra rule to this to allow inbound connections on port 80.
Click on the subnet name in the details page of the Compute Instance.
Then you can select the default Security List.

And finally add an Ingress Rule.
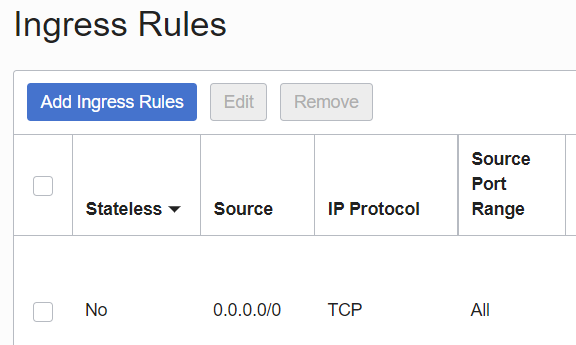
We should allow incoming traffic to port 80 from all source IPs. This will look like the below:
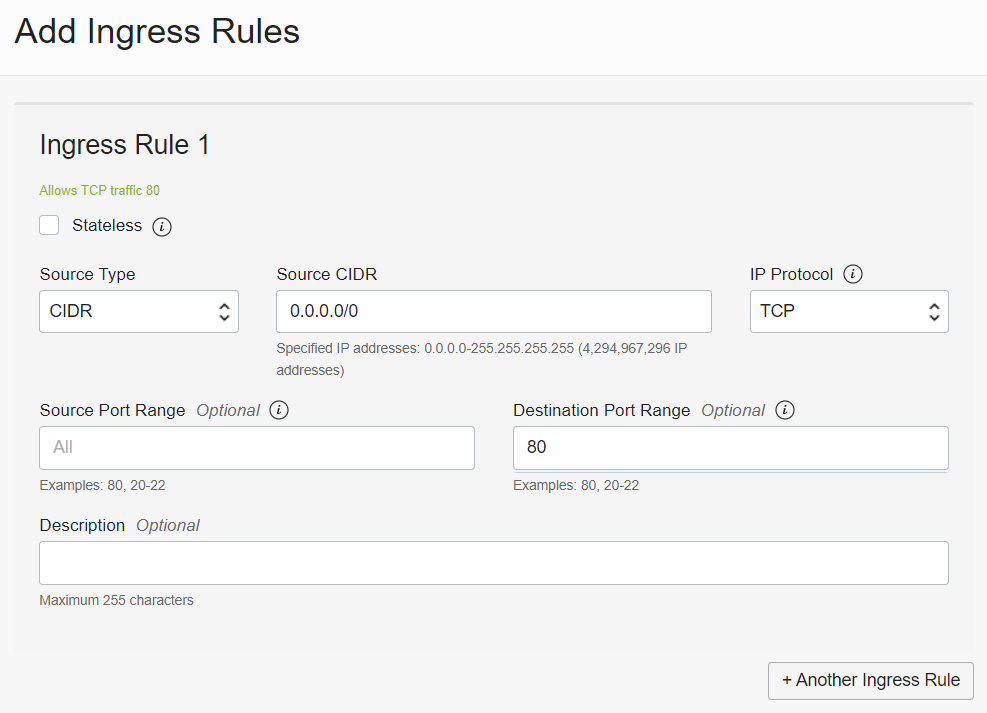
Once this is saved, you can go to the public IP displayed on the Compute Instance’s details page and you should be greeted with your WordPress’s setup page.
The next stage depends on how you wish to set things up. As ORACLE provides a fixed IPv4 address, Dynamic DNS is not a requirement here. You can simply buy a domain name and add an A record, pointing to your site’s public IPv4 and be done with it. That’s what I’m going to do here.
I purchased the domain from GoDaddy. There website is very simple, so I won’t explain the process here. You can use them as the DNS / name server, but I wanted to delegate that to Hurricane Electric. There, you’ll have an option to override the nameservers. The reason why I chose to go with HE instead is because they support Dynamic DNS and while this domain won’t be using it for the time being, I may set up others there that will. If you’re happy with using them, you won’t really need HE, as you can directly add an A-record on their website. However, if you do want to change them, carry on reading below.
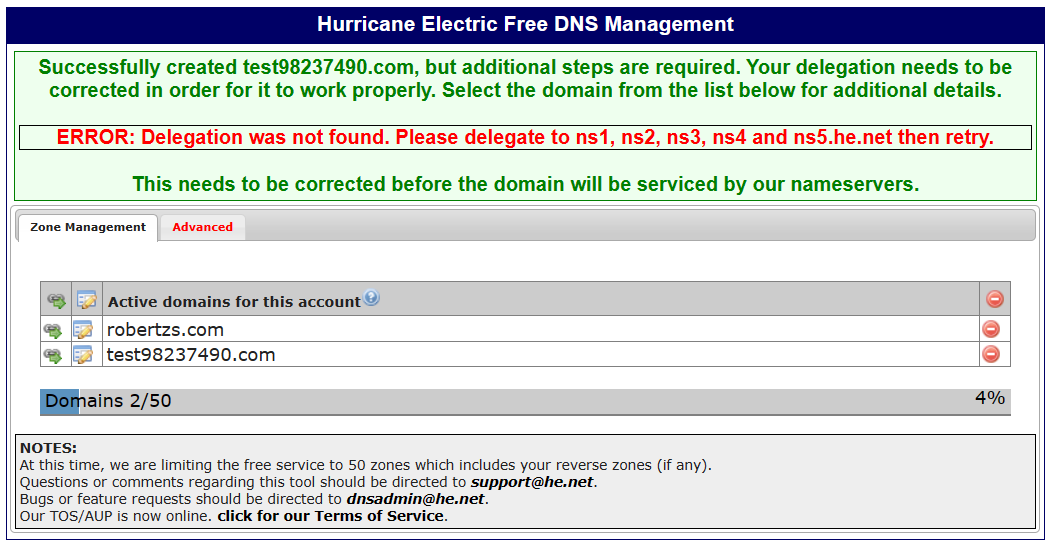
Go and register on Hurricane Electric Hosted DNS (he.net). Once that’s done, log in and choose “Add a new domain”. Simply enter the domain name you chose and click “Add Domain!”. You’ll be greeted with the below, telling you that the delegation was not found, so let’s fix it.
Go back to GoDaddy and click “DNS” on the right of your new domain name, which should take you to the DNS Management page. In the Nameservers section, click on “Change”, then choose “Enter my own nameservers (advanced)” in the popup. Enter the five nameservers below:
ns1.he.net
ns2.he.net
ns3.he.net
ns4.he.net
ns5.he.net
Save it and grab a tea. You’ll probably need to wait until the next day to proceed, as delegating a domain from one nameserver to another may take up to 24 hours. You’re also done on GoDaddy, the rest of the setup will need to be done on HE.
So, 24 hours later, you can go back to HE and click the “Edit Zone” icon just on the left of the domain name you added. Here, you need to create a new A Record, so click “New A” and fill in the popup as shown below:
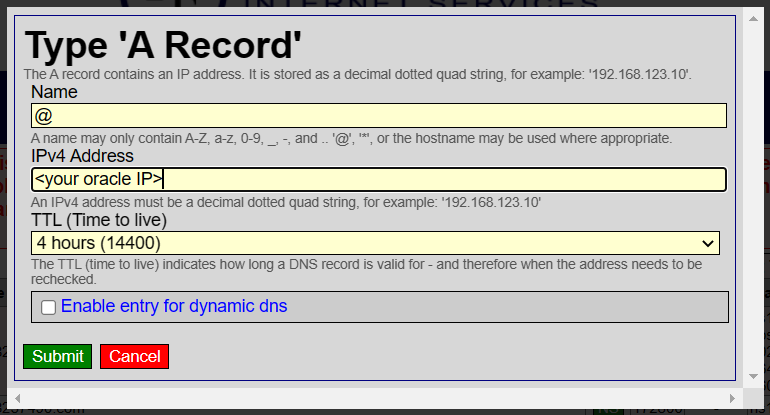
Once that’s done, you should be able to reach your website using the URL. You may need to refresh the DNS resolver if you’re using pfSense or any other local DNS cache.
Tweaks
I usually like to increase the file size limits, which can be done by adding a php.ini file to the root folder of the docker volume that WordPress is using. To get the path, use the commands below:
# get the location of the docker volume
docker volume inspect wordpress_wordpress_data
# this will give us the "Mountpoint" on the local filesystem
# we need to be root to enter this folder
sudo su
# navigate to the folder containing the docker volume
cd <mountpoint> <going to be something in /var/lib/docker/volumes...>
Now that we’re in the root folder of the wordpress_data docker volume, we need to create a php.ini file there with the below contents. And likely restart WordPress after we save it using the docker compose restart command from the folder containing the docker-compose.yaml file.
memory_limit = 256M
post_max_size = 128M
upload_max_filesize = 512M
The above changed the limits set by the hosting provider, which is us in this case. To change the limits set by WordPress, you will need to install a plugin called “Wp Maximum Upload File Size” by CodePopular. That will let you increase the limits within WordPress.
If you’d like to transfer the contents of an existing WP site, you can use the “All-in-One WP Migration” plugin, version 6.77. The version is important, as newer versions may have issues when restoring backups. There is a guide on how to use it here. Install it on both instances, back up the old one and restore it on the new one. That’s it.
By now you should have a working WordPress installation, so enjoy! This very instance has been set up using this guide, so you’re most likely getting this page from ORACLE’s datacenters in London.
Leave a Reply