This article is just a glance at my latest NAS build and isn’t really meant to be a tutorial. I would rather define it as a number of ideas that you can use when they are building their own device.
What is a NAS?
Network-attached storage (NAS) is a file-level (as opposed to block-level storage) computer data storage server connected to a computer network providing data access to a heterogeneous group of clients. The term “NAS” can refer to both the technology and systems involved, or a specialized device built for such functionality (as unlike tangentially related technologies such as local area networks, a NAS device is often a singular unit).
Network-attached storage – Wikipedia
I like using these quotes, even though this particular one was spectacularly useless in driving my line of thoughts forward. The question should rather be:
What do you want to run on the NAS?
That’s more accurate.
My NAS is not just a file server, although that is still one of its more important functions. But, as well as serving files, it’s also hosting video streaming services, such as Jellyfin or Plex, synchronizing files across my devices using Syncthing, handling downloads, then there is also Calibre for my books, VS Code as a pastebin across devices, Homeassistant, and a few other things, all of them nicely tied up using a dashboard with links pointing to every one of them.
All of this needs to be achieved in a package that’s quiet, as I don’t have a separate storage room to shove it away and has a low power as the current energy prices in the UK (£0.32/kWh) are not particularly low.
So, I need enough performance to transcode a single 4K stream at a time and enough memory to run a number of services. 10G networking would also be nice to handle large files and it all need to be wrapped in a small and quiet package.
To accomplish that last point, I decided to split the data in half between a “hot” SSD-based array and a “cold” HDD-based array, as having hard disks running all the time is not only noisy, but also consumes a fair bit of power.
The hardware
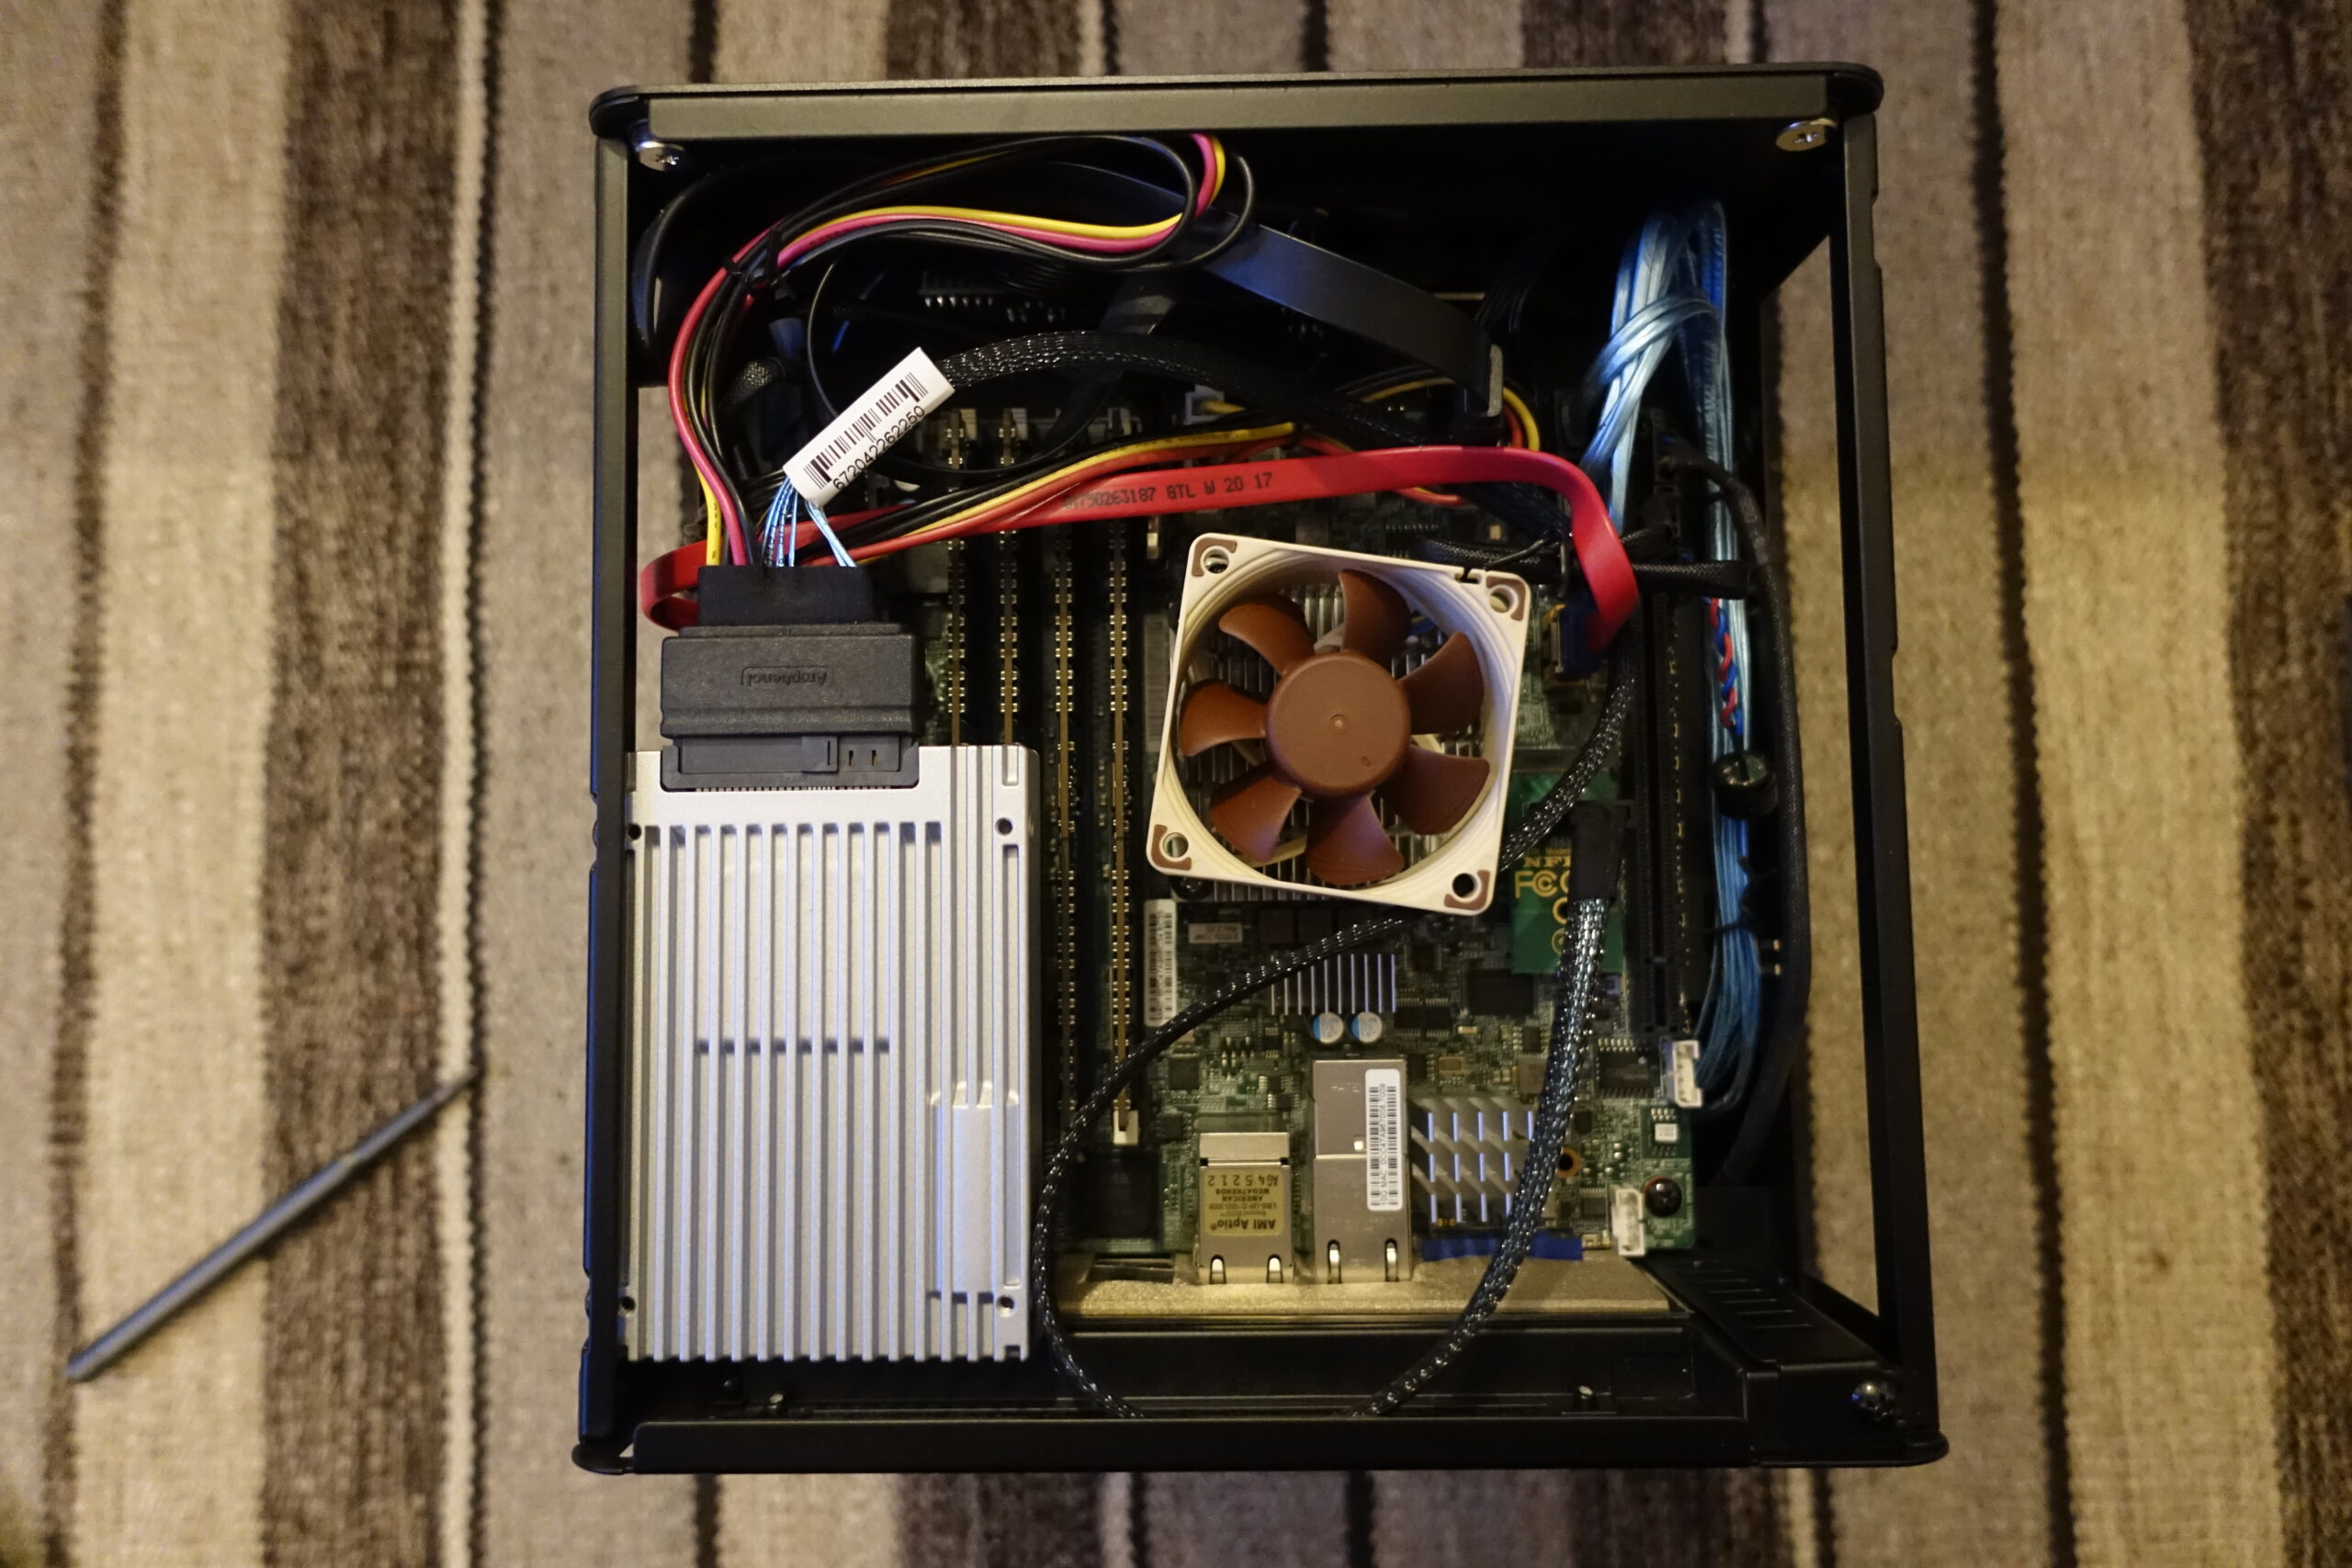
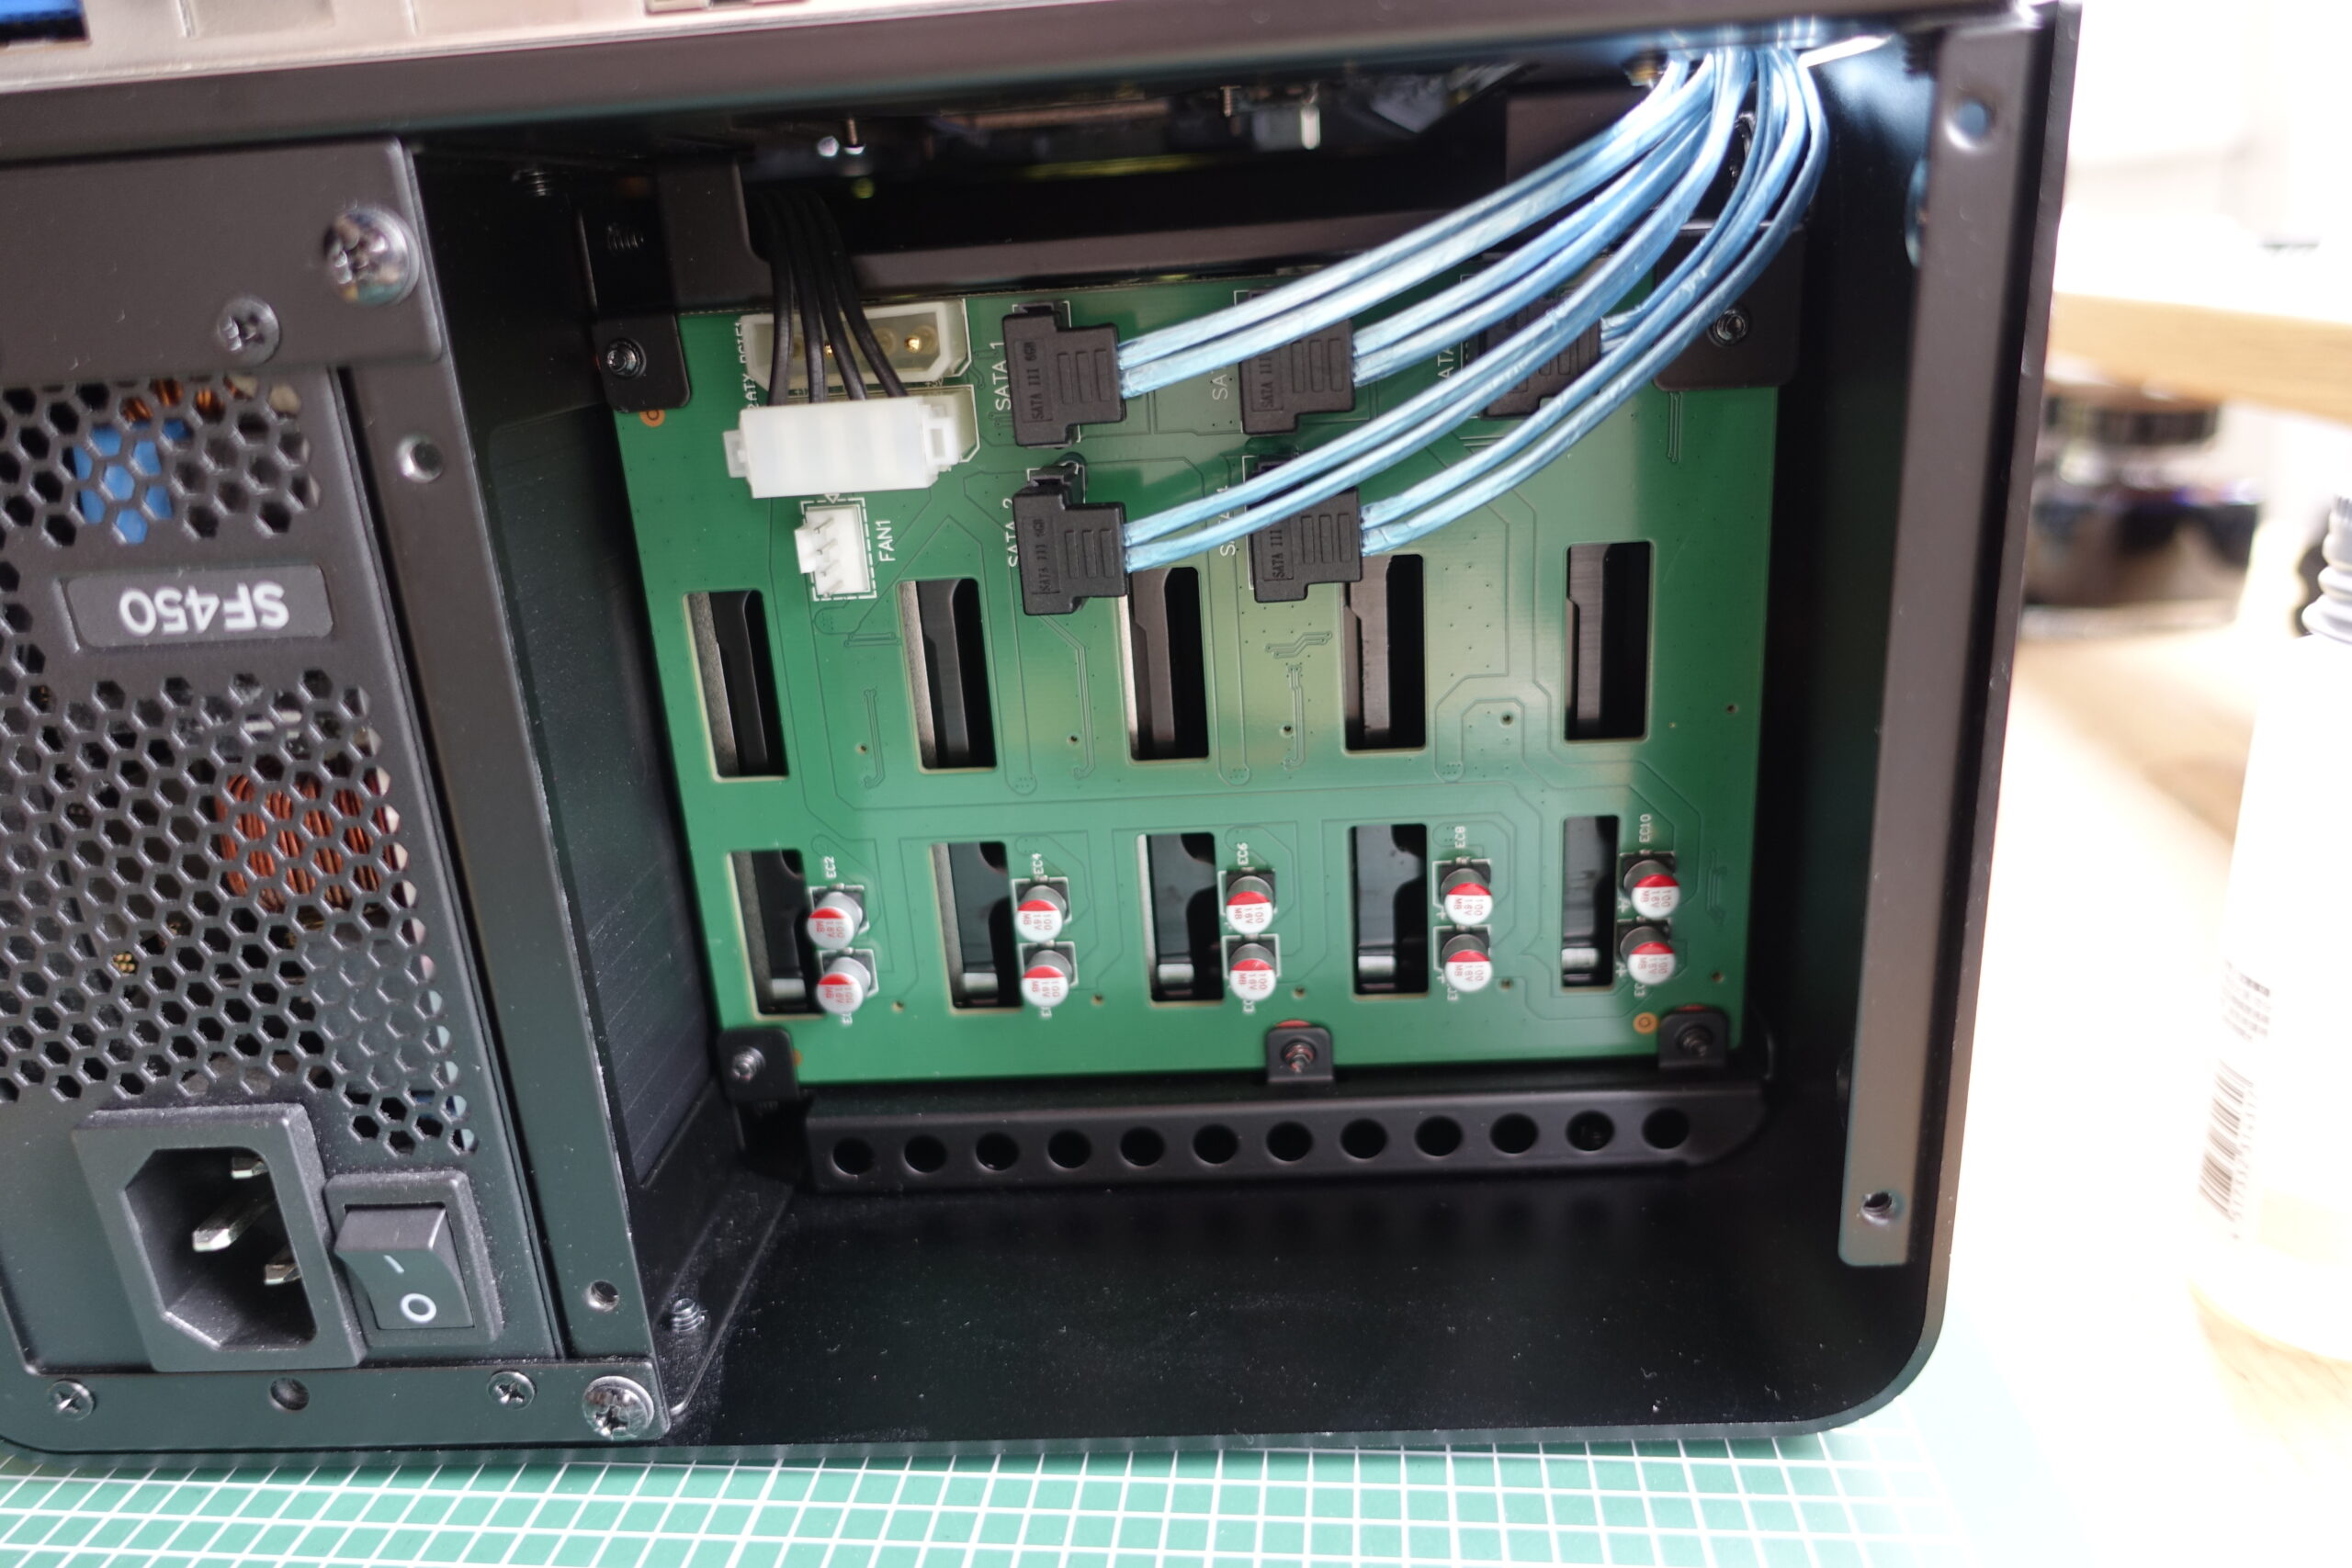
- Jonsbo N2 ITX Case, with five 3.5″ hot-swap bays and space for a low-profile HHHL expansion card.
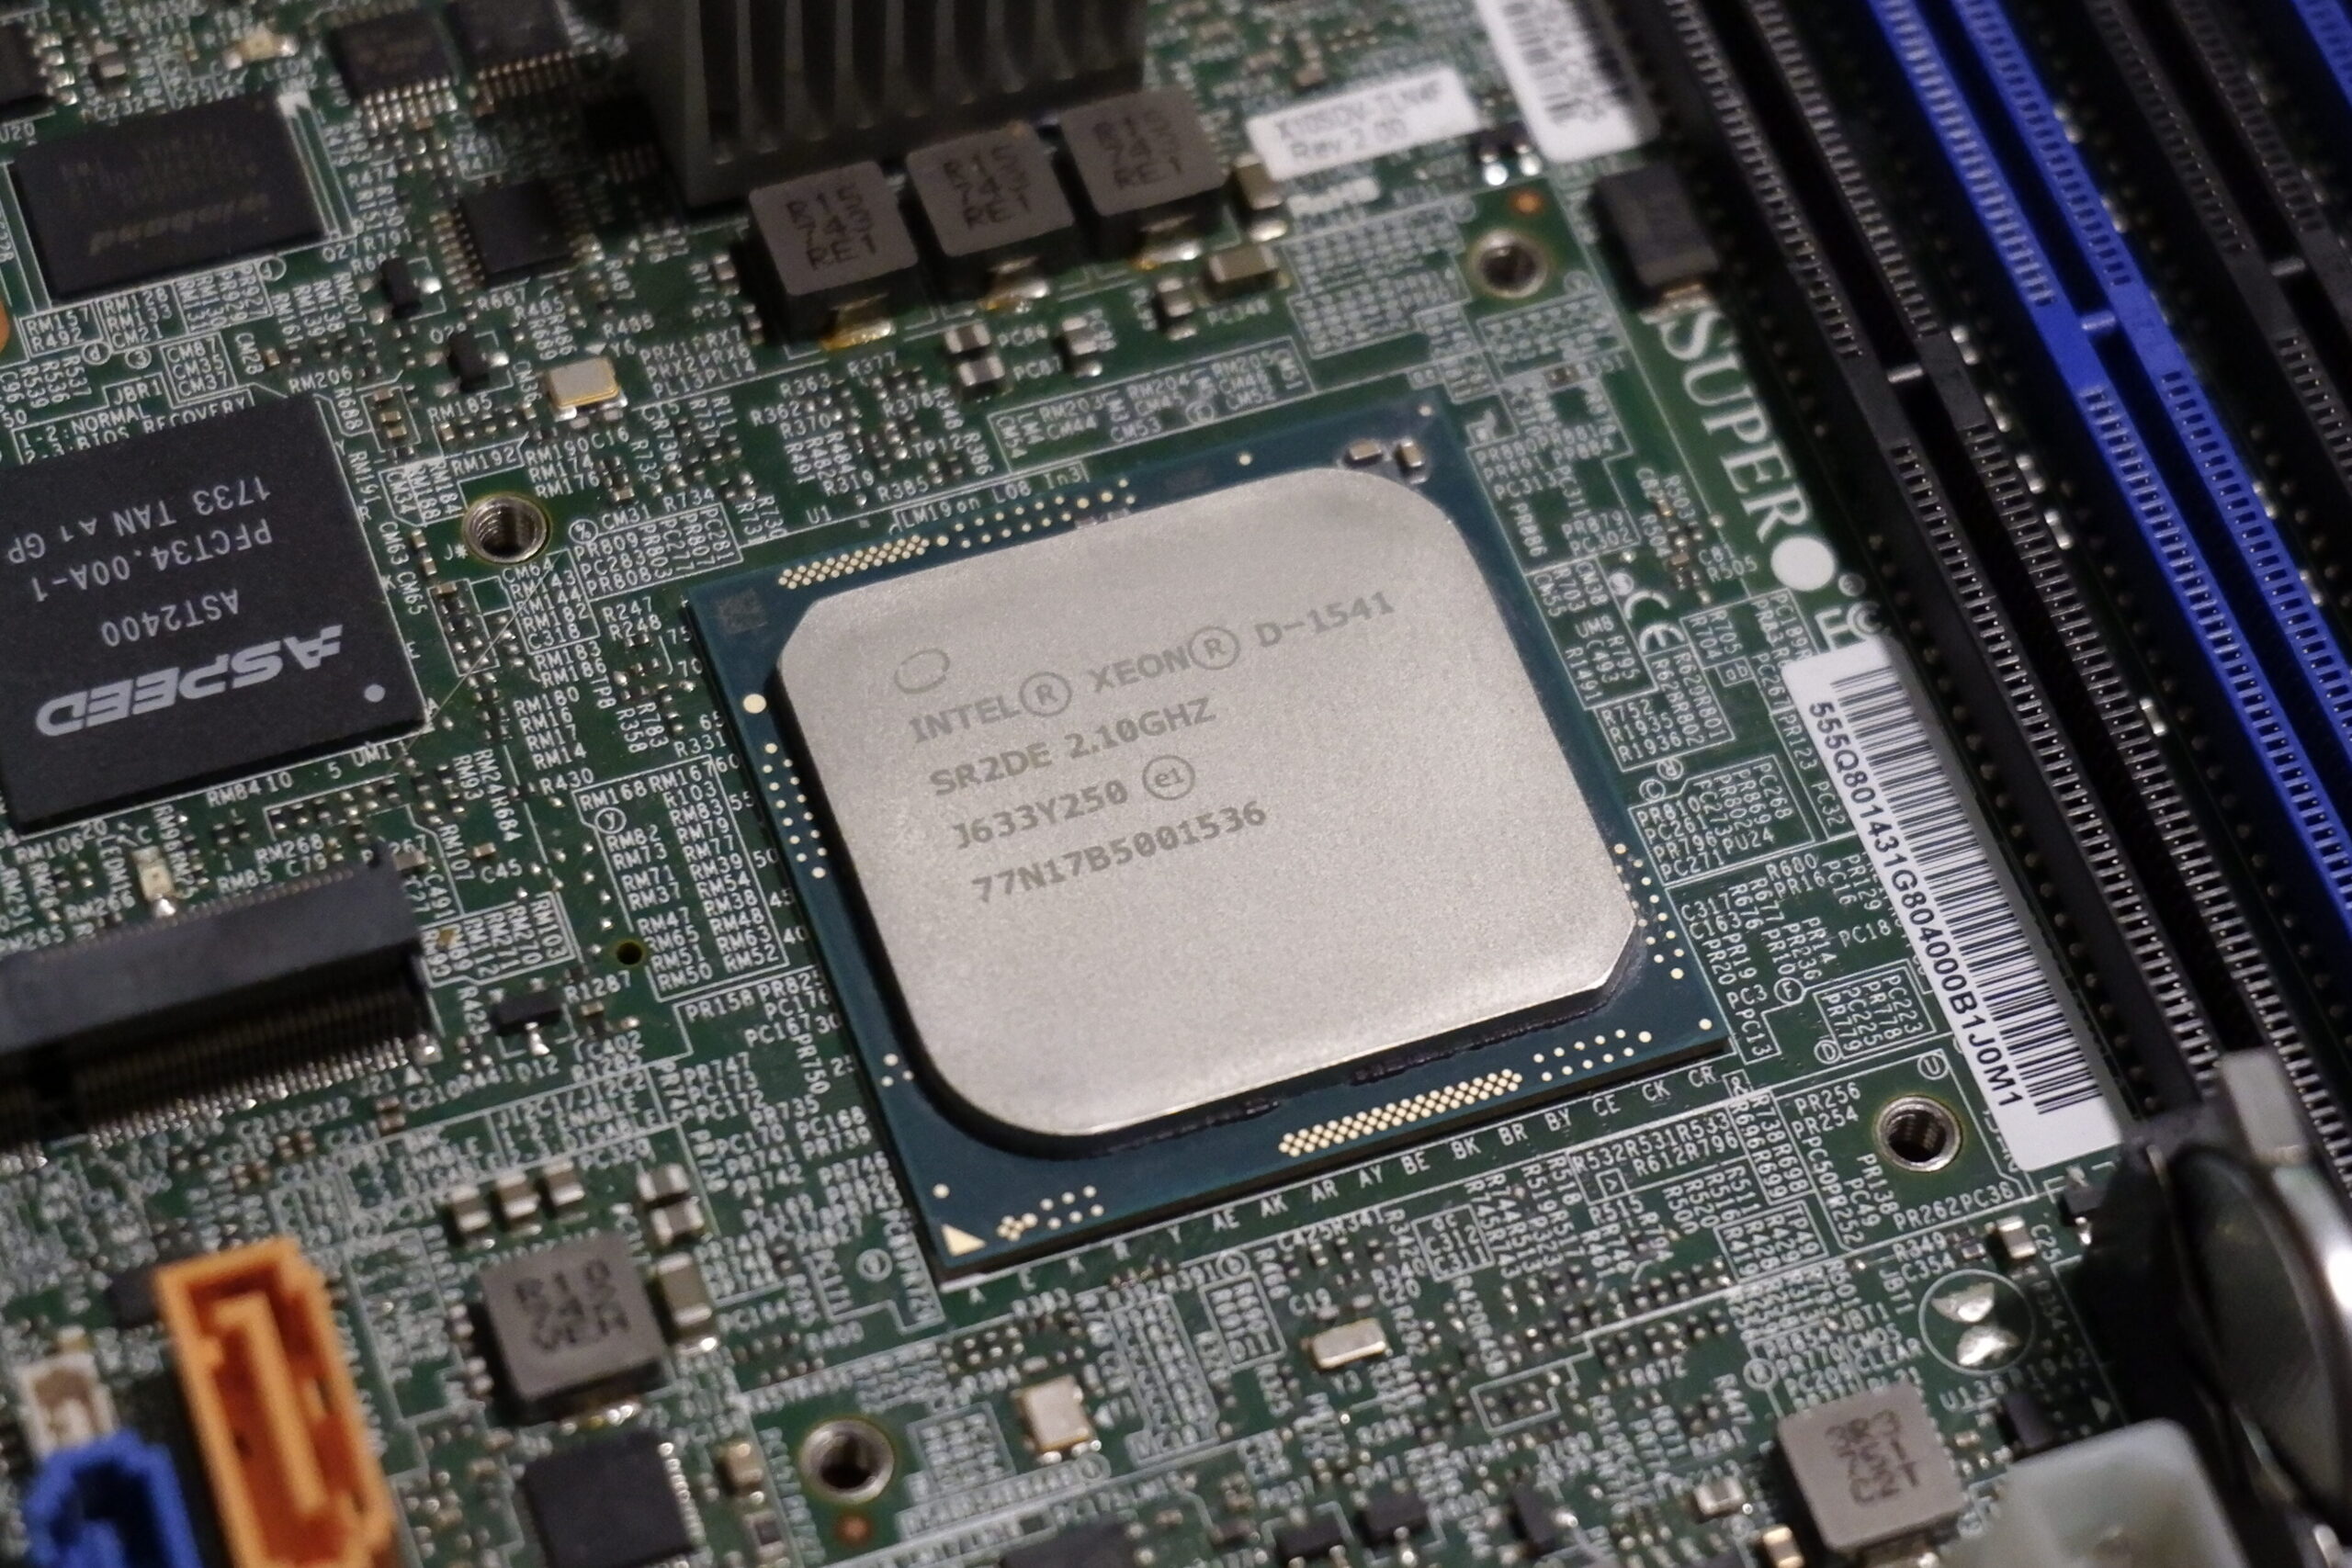
- Supermicro’s X10SDV-TLN4F Motherboard with an 8-core Intel Xeon D-1541, integrated 10G LAN and IPMI
- 4x32GB DDR4 ECC RDIMM
- A 200GB Intel S3710 SATA SSD for booting
- A Corsair SF450 450W SFX PSU
- One 11TB Micron 9200 ECO 2.5″ U.2 NVMe SSD
- Five HGST 10TB HUH721010ALN604 SATA Hard drives
I quite like the case, although it only has one 2.5″ space, so the SATA drive is just thrown in behind the PSU, but it’s good enough. The board is 8 years old technology, but it has eerything I need and doesn’t pull too much power. If I was building it with new components, I would likely go for some other ITX board with 6 SATA ports and integrated 10G, but they are not that easy to find, I’m afraid. Supermicro probably has some newer boards and ASRock Rack also has a few similar solutions too. Having 10G networking and an adequate number of SATA ports integrated allows me to use the PCIe slot for something a little more exciting, such as a graphics card for video encoding or running VMs with accelerated graphics.
The storage config
The storage is split, but not in a conventional way. The 11TB SSD is used as hot storage for the frequently used data and the five 10TB HDDs are configured in RAIDZ1 and used as backup. They are set to spin down after an hour of inactivity and while I’m well aware that frequently spinning them up isn’t going to do any favours for their longevity, I’m fine with that. I rarely need to touch that data.
There is a snapshot creation task that is scheduled to run once a week, it creates a snapshot of the datasets on the SSD and copies them to the HDD array.
Virtualization
I initially had an AMD W6400 in the PCIe slot, passed through to a VM, and while it worked okay, there was an issue where I couldn’t get digital sound working in Windows, no matter what I tried. Linux was okay with a carbon copy of the VM config, but as I was going to use it for video playback, I really needed Windows, as Linux doesn’t handle HDR videos that well and I also missed MPC-HC and madVR, so I decided to outsource video playback again to a HP T740 in the end.
The W6400 is an interesting beast. It’s the fastest single slot low-profile GPU, which can easily outpace a 7970 (I had one 6-7 years ago), but it has its own caveats. Compared to its consumer-oriented counterpart, the RX 6400, it doesn’t support Zero RPM mode, so the fan is always on, even in idle. It’s pretty much inaudible at 1000rpm, but I would still prefer it to be off. The idle power is 4W, which is great.
It’s also missing any sort of acceleration for video encoding as well as AV1 decoding. The VCN 3.0.33 implementation that this GPU has is a little cut-down. Here is a table comparing it to the rest of the AMD cards.
Broadwell-DE is an SoC with no external chipset, but the USB3 controller can be passed through to a VM, as it appears just like any other PCIe device and there are no issues with IOMMU groups. Below is the bock diagram of the CPU.

The below slows the output of lspci:
00:14.0 USB controller: Intel Corporation 8 Series/C220 Series Chipset Family USB xHCI (rev 05)
00:1a.0 USB controller: Intel Corporation 8 Series/C220 Series Chipset Family USB EHCI #2 (rev 05)
00:1d.0 USB controller: Intel Corporation 8 Series/C220 Series Chipset Family USB EHCI #1 (rev 05)
00:1f.2 SATA controller: Intel Corporation 8 Series/C220 Series Chipset Family 6-port SATA Controller 1 [AHCI mode] (rev 05)
01:00.0 Non-Volatile memory controller: Micron Technology Inc 9200 ECO NVMe SSD (rev 02)
03:00.0 Ethernet controller: Intel Corporation Ethernet Connection X552/X557-AT 10GBASE-T
03:00.1 Ethernet controller: Intel Corporation Ethernet Connection X552/X557-AT 10GBASE-T
05:00.0 PCI bridge: Advanced Micro Devices, Inc. [AMD/ATI] Navi 10 XL Upstream Port of PCI Express Switch
06:00.0 PCI bridge: Advanced Micro Devices, Inc. [AMD/ATI] Navi 10 XL Downstream Port of PCI Express Switch
07:00.0 VGA compatible controller: Advanced Micro Devices, Inc. [AMD/ATI] Device 7422
07:00.1 Audio device: Advanced Micro Devices, Inc. [AMD/ATI] Device ab28
08:00.0 Ethernet controller: Intel Corporation I350 Gigabit Network Connection (rev 01)
08:00.1 Ethernet controller: Intel Corporation I350 Gigabit Network Connection (rev 01)
0a:00.0 PCI bridge: ASPEED Technology, Inc. AST1150 PCI-to-PCI Bridge (rev 03)
0b:00.0 VGA compatible controller: ASPEED Technology, Inc. ASPEED Graphics Family (rev 30)
I have removed the irrelevant entries, but we have three separate PCIe USB controller devices and these can be passed through directly to VMs as USB controllers. I haven’t yet tested the USB2 controllers, but the USB3 controller works well. No issues with device reset (Fresco logic controllers and some Sonnet cards based on them don’t like passthrough) or any other serious issues. I found a card reader that didn’t like to be plugged into the passed through USB3 ports, but that’s it. And it’s possible that it wouldn’t like the controller anyway.
I also needed to create a network bridge and assign that to the VMs’ virtual NICs. Without it, they weren’t able to access TrueNAS itself. It’s just a bridge with one or more physical NICs attached and TrueNAS’s IP configured on the bridge instead of the physical interface.
Some tweaks
I love the case, but the included 15mm fan was quite disappointing, so I replaced it with a Noctua NF-S12A PWM, removing the included fan grills, which would have otherwise obstructed the airflow significantly.
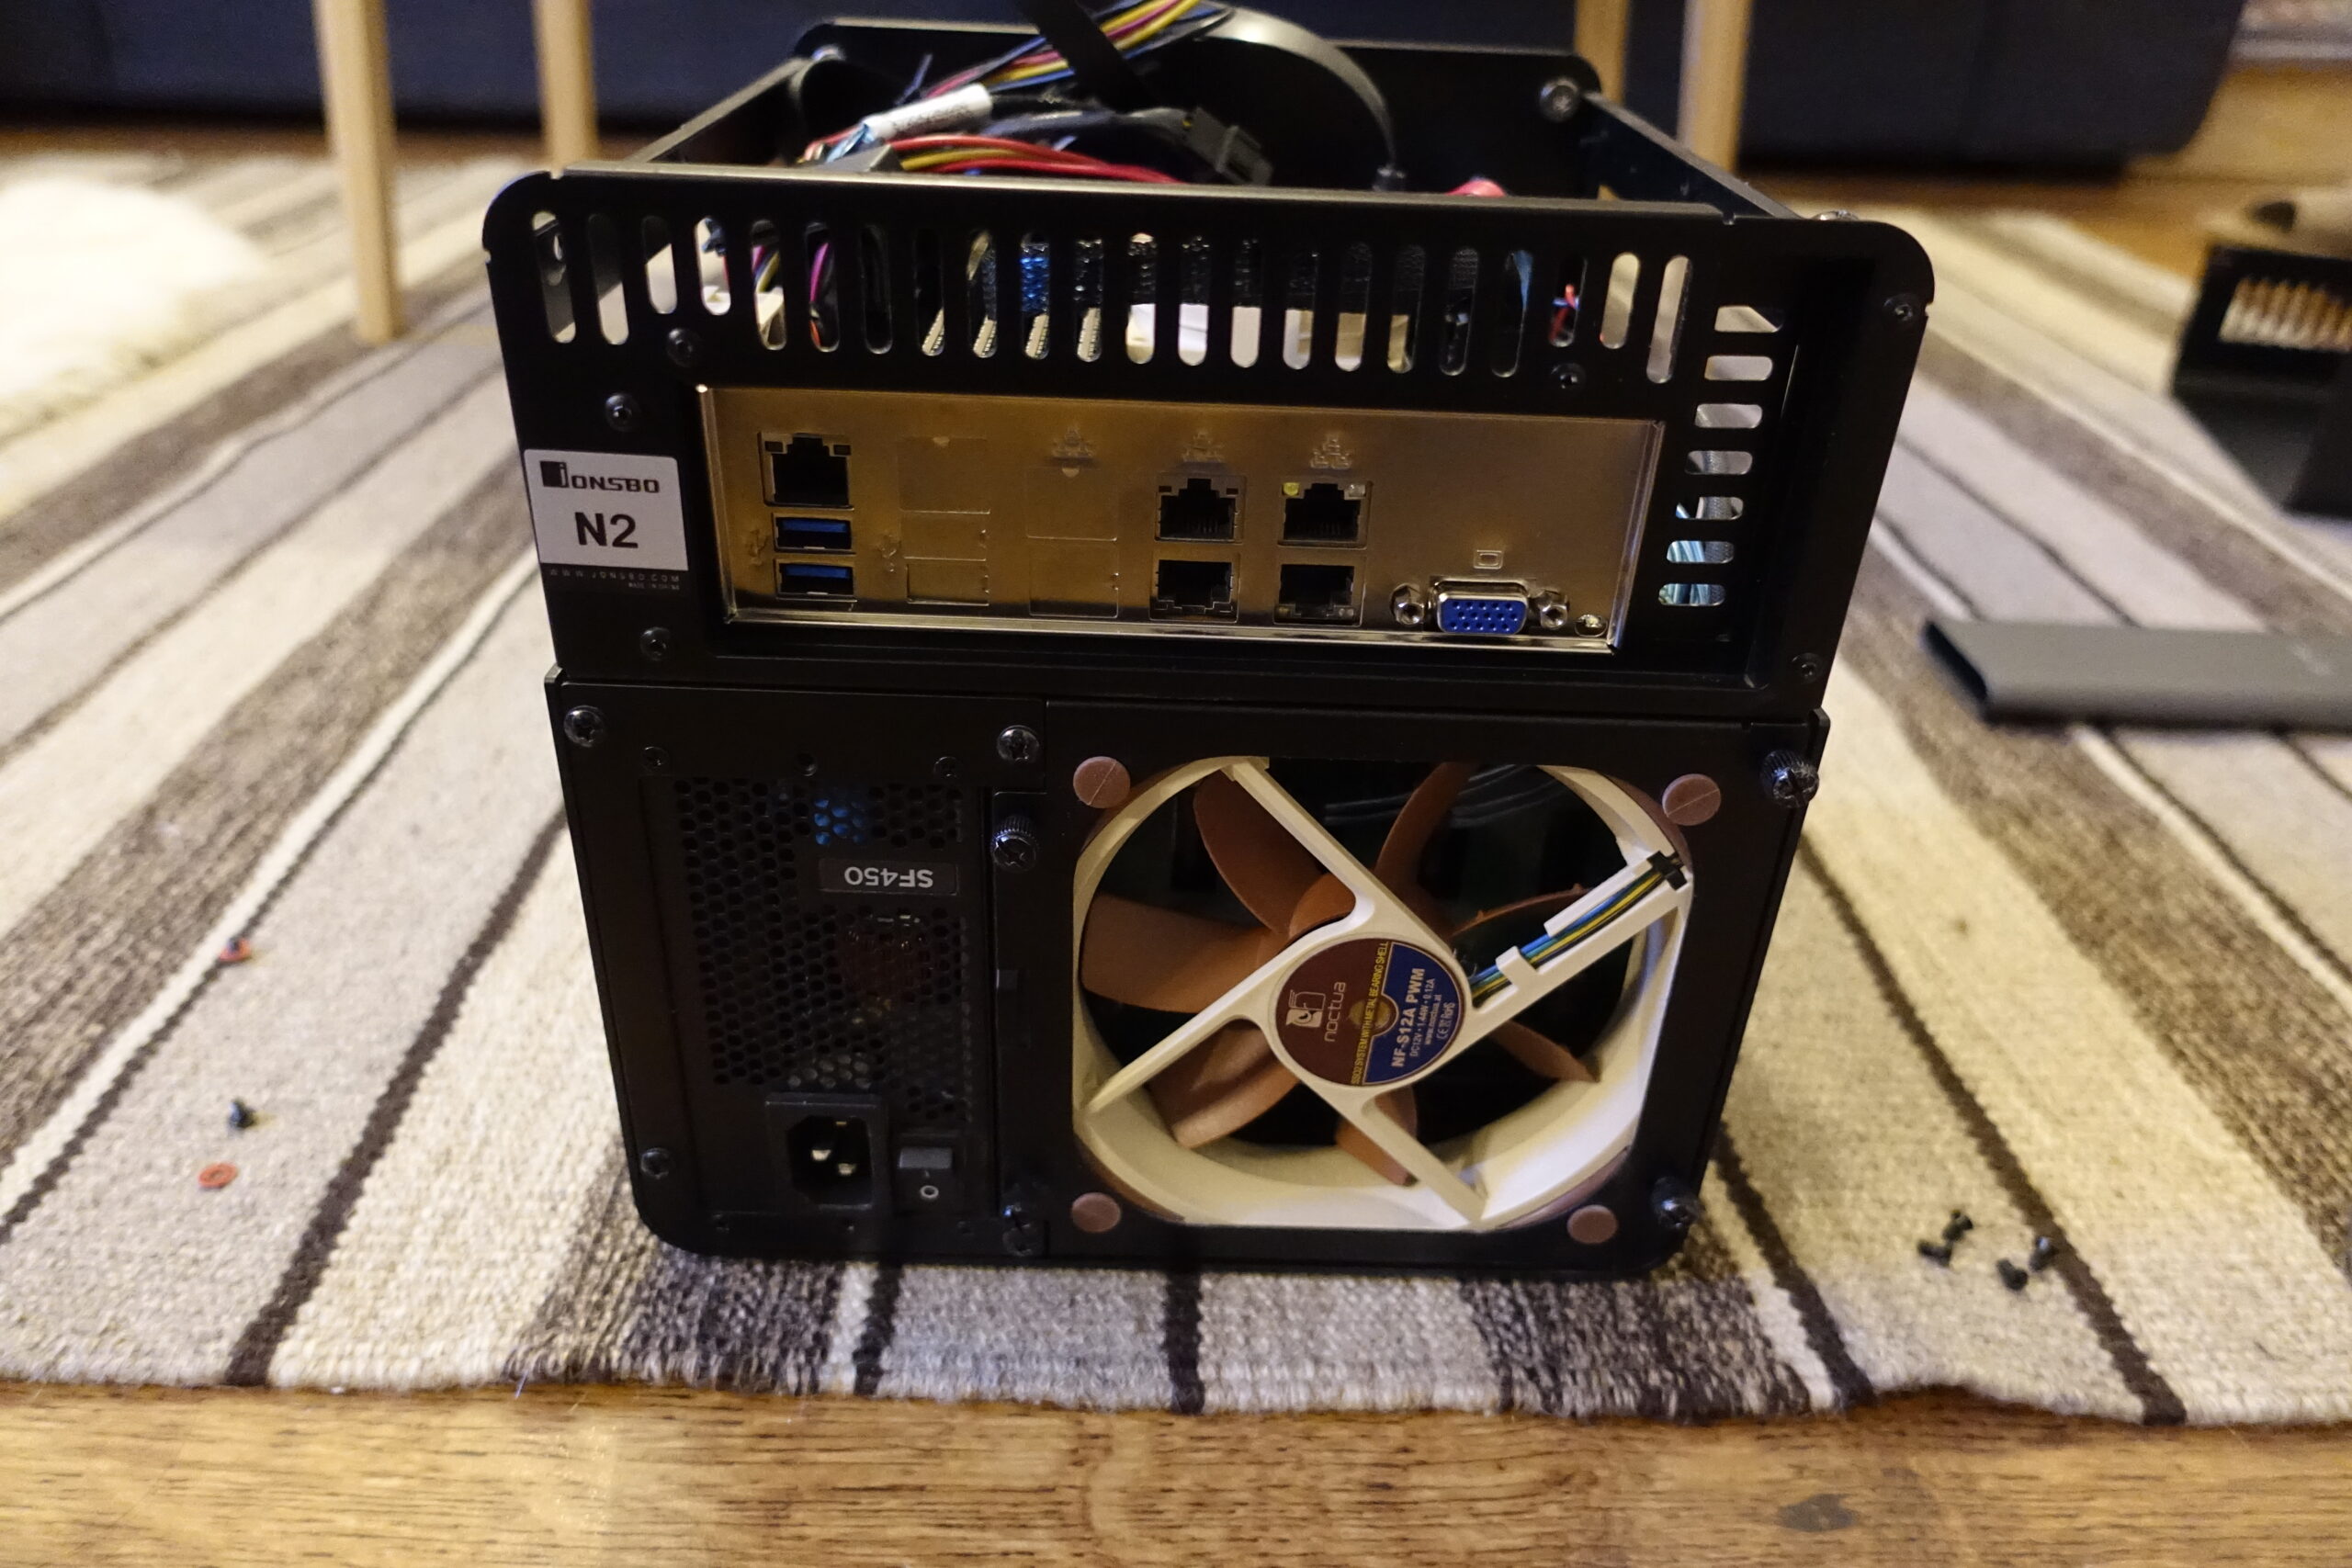
I also made a custom power cable with a right-angle molex power connector at one end (it’s enough to connect one of them) and bought some 30cm long right-angle thin SATA cables. These allowed me to fit the NF-S12A fan in the case with no issues.
The fan on the CPU cooler wasn’t exactly quiet, so it was replaced with a 60mm Noctua fan and I had a similar but slightly taller cooler from a Gigabyte Xeon-D board with the same 51x51mm hole spacing, which I used instead. However, it should be possible to stick a Noctua fan on the original Supermicro cooler with some zipties.
The motherboard didn’t like the Noctua fans. The IPMI that controls them complained because the RPM on them went below the lower critical threshold and it kept ramping them up every 10 seconds. To correct that, we can change these thresholds using ipmitool as below. This is persistent across reboots.
# get the sensor names
ipmitool sensor list
# set the thresholds for a sensor
ipmitool sensor thresh "*sensor name*" lower *lnr* *lcr* *lnc*
# for example
ipmitool sensor thresh "FAN1" lower 100 300 500
# the defaults are 300 500 700, I set them to 100 300 500
Power consumption
I would like to quickly note some power consumption figures here, as I think it may be useful for people to know what they can expect this configuration to consume. All of the below depict the idle power of different configurations, with the exception of the first one. These were all measured at the wall, using the Corsair SF450 PSU.
- Off with only the IPMI = 8.8-9.3W
- MB with 200GB boot drive only = 36W
- MB with 200GB + 11TB SSD = 46-48W
The IPMI uses quite a bit of power, but that’s something I need and can’t really get rid of. The amount of RAM doesn’t make any difference, as four sticks used just as little power as two. DDR4 seems to be a lot more efficient than DDR3 in this regard, although I’m sure that under load there would be a measurable 5-10W difference.
The 11TB SSD’s 10-12W idle power is significant, but then, it’s an enterprise drive so that’s not particularly surprising.
The tests all included two fans, although their power consumption is likely to be negligible, 1-2W at most.
Summary
I think it ended up being a very versatile device, giving me a lot of storage space, as well as the processing power and memory to run a large number containerized services and virtual machines. If there is one thing I would complain about, it would be how badly TrueNAS Scale handles the applications, as they often just refuse to start up or flat out break when being upgraded. The Truecharts repository adds a lot of additional configurations, the option to use Traefik, but it still doesn’t allow for configuration file based deployments, which I really miss from docker compose. Every time I deply a service, I need to start from scratch on the GUI, which can be very time consuming.
In retrospect, I don’t think I would re-do the hybrid storage config either. For whatever reason, it’s seemingly impossible to keep the hard drives spun down for any extended amount of time and they tend to start up at least a handful of times each day, even if there is no direct access to the data and the S.M.A.R.T. service is completely turned off. Of course, this scenario is the worst, as I don’t want the drives that hold important data to be spun up multiple times a day, as that’s what shortens their lifetime the most.
Aside from these complaints, I love the Xeon-D and the board, it’s an impressively compact package for what it has to offer and still has sufficient power for today’s computing requirements. Right now, the required Registered DDR4 DIMMs are fairly inexpensive and the m.2 and PCIe slots make it compatible with most modern hardware, even if the board itself is 8 years old at this point. You also get USB3 and the ability to pass it through to a VM, if needed, without having to use an external PCIe controller, so it’s possible to run a VM with local devices (non-RDP based) with just an extra GPU.
There are better alternatives out there, but very few offers this level of integration in such a small size. Most, if not all, consumer boards will be missing the four DIMM slots, the IPMI and most likely the 10G Ethernet as well, which could be alleviated by using larger DDR5 DIMMs, if supported, and and m.2-based 10G NIC, which can be quite useful for smaller builds. You would likely also get an integrated GPU inside the CPU this time, which would work just as well for booting and could allow you to use a second one for VMs or video encoding.
Leave a Reply