My grandmother’s birthday is coming up and I was wondering what to give her when I remembered this video I watched a few months ago on an eink picture frame. I checked pimoroni’s site and they actually had larger, 7″ variants in stock, which can neatly fit in a 10x15cm (6×4″) picture frame, so I thought I would give them a try and ordered one.
They have two flavours available, one comes with a 40-pin header for a raspberry pi and the other has a pre-soldered pi pico W. I chose to go with the former, as it has no added bezels and I had a pi zero w laying around anyway. Power comsumption wasn’t really a factor as it can be plugged into mains and the pi zero allows me to run syncthing to upload new pictures to the device remotely, without having to write any additional code to do it.
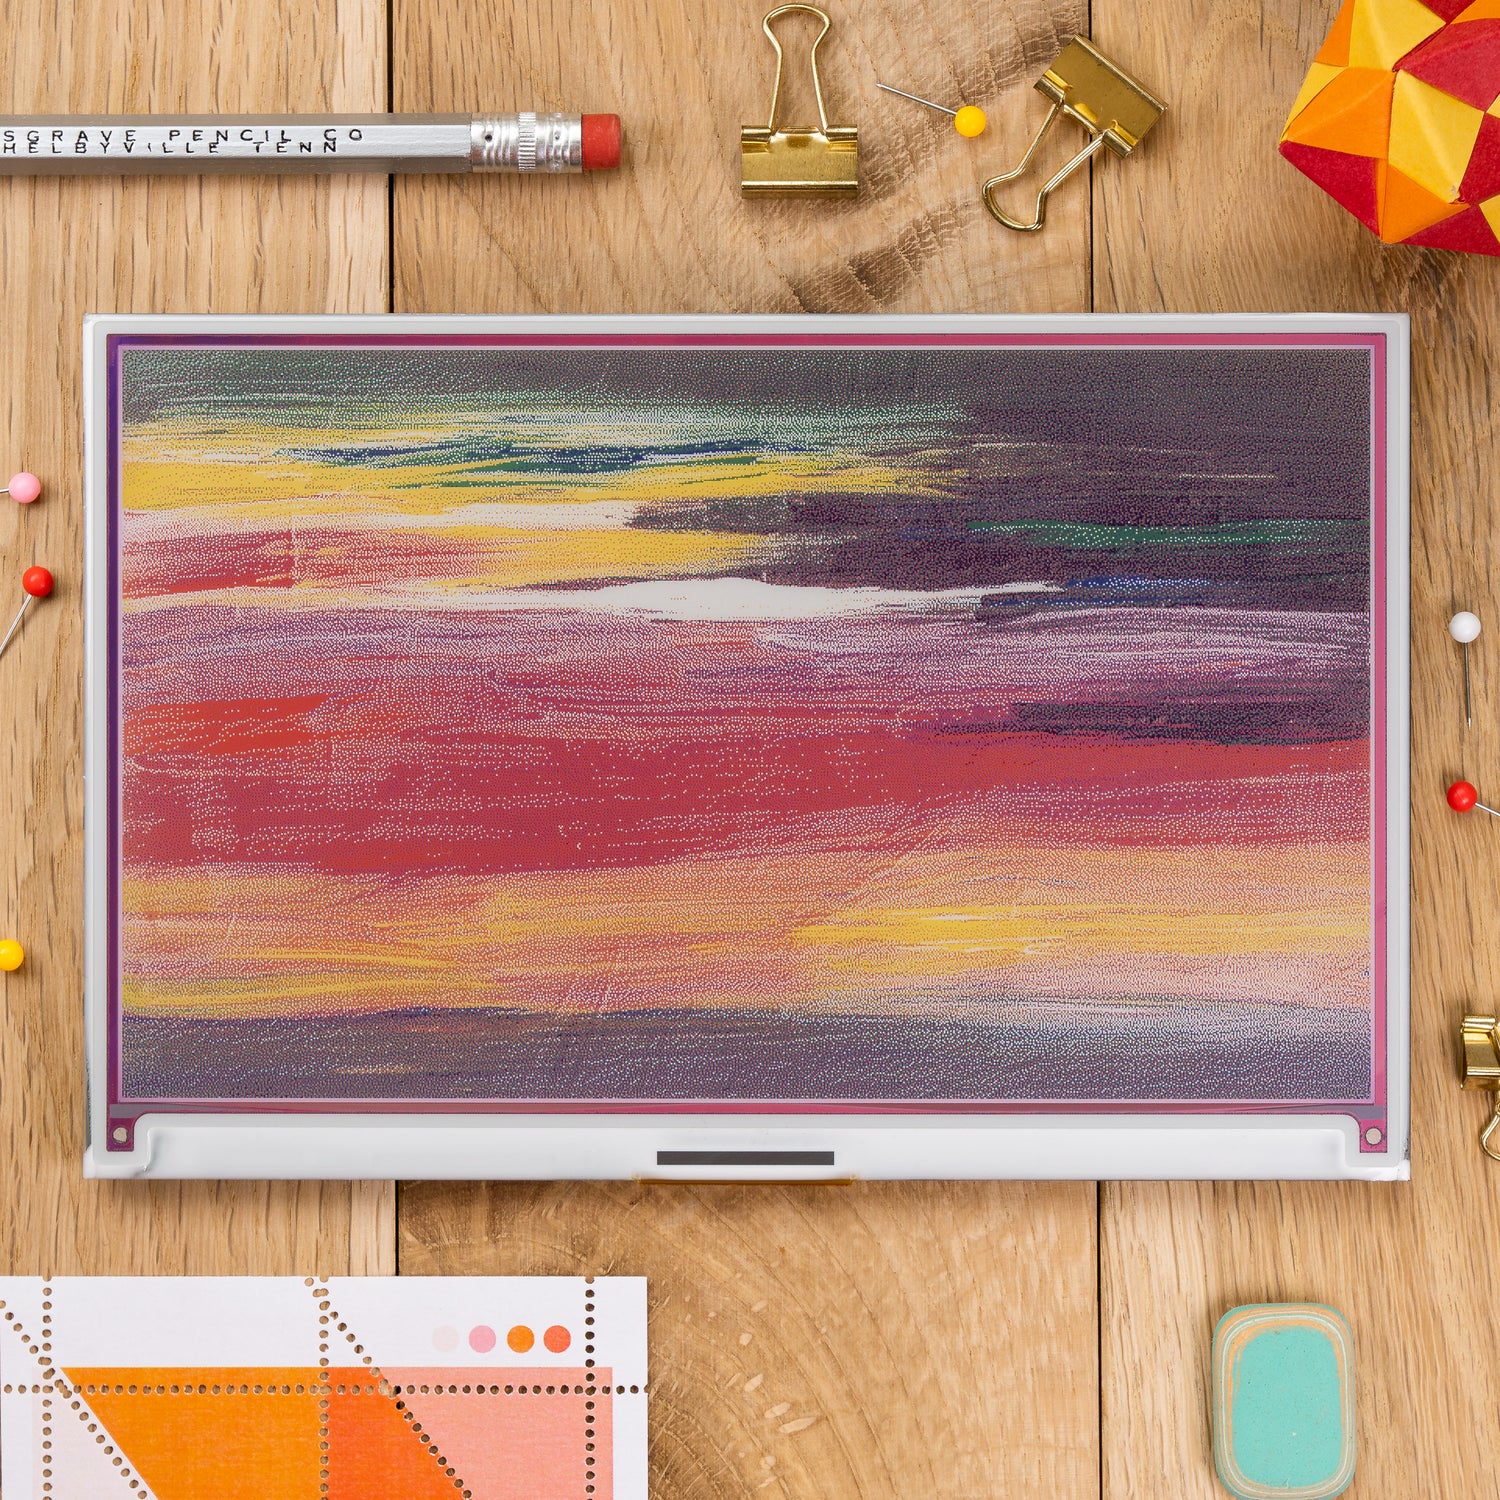
The sccreen is pretty big and while the 800*480 resolution is quite high for a colour eink panel, my Kobo Aura One has a 1872*1404 panel, albeit that’s only grayscale. So there is definitely a tradeoff between the resolution and the ability to display colours.
Speaking of colours, the way these colour eink displays work is quite interesting. Unlike LCD, OLED and pretty much any colour display panels, there are no subpixels. Instead, each pixel can be any of the seven colours, which are black, white, red, green, blue, yellow and orange. Seemingly, there is also no way to create gradients within a colour, so it’s either fully green or not green. There is no inbetween, and so for the gradients, the screen uses dithering, which can be visible from shorter distances, but from about a metre away, I can’t see the individual pixels anymore.
The colours are nice, not quite as vibrant as real ink, but having this amount of colour is way better having none at all.
The build
Setting it up is quite simple, just burn a copy of raspbian OS to a microSD card, I used Pi OS Lite as I didn’t need the graphical interface, and set up the wlan using sudo raspi-config.
Pimoroni provides a github repository with everything needed to make the display work and the also have a script that installs and sets up the required software and libraries, which is what I used. Just run curl https://get.pimoroni.com/inky | bash and give it around 15 minutes to do its thing.
Once done, you can use the image.py script in Pimoroni/inky/examples/7color to display an image. It automatically resizes them too. To use it, just run ./image.py <image_path> <saturation> where the image_path is the image path and saturation is a decimal number between 0 an 1 and it makes the image more or less colourful. 0.5 is the default when the parameter is omitted, as it is optional.
Syncthing
To set up syncthing, just follow the instructions below, or on the official site. This should work on all debian and ubuntu based distros.
# Add the release PGP keys:
sudo curl -o /usr/share/keyrings/syncthing-archive-keyring.gpg https://syncthing.net/release-key.gpg

# Add the "stable" channel to your APT sources:
echo "deb [signed-by=/usr/share/keyrings/syncthing-archive-keyring.gpg] https://apt.syncthing.net/ syncthing stable" | sudo tee /etc/apt/sources.list.d/syncthing.list

# Add the "candidate" channel to your APT sources:
echo "deb [signed-by=/usr/share/keyrings/syncthing-archive-keyring.gpg] https://apt.syncthing.net/ syncthing candidate" | sudo tee /etc/apt/sources.list.d/syncthing.list

sudo apt-get update
sudo apt-get install syncthing

# To automatically start the service on boot
# replace myuser with the user you want to run syncthing as
# you can use admin, or create a separate user for the service
sudo systemctl enable --now [email protected]
As the GUI is only visible on the localhost by default, we need to change the config files to make it accessible from other computers on the local network. To do this, the ~/.config/syncthing/config.xml file needs to be amended. The address has to be changed form 127.0.0.1 to 0.0.0.0 in the section below.
<gui enabled="true" tls="false" debugging="false">
    <address>127.0.0.1:8384</address>
    <apikey>k1dnz1Dd0rzTBjjFFh7CXPnrF12C49B1</apikey>
    <theme>default</theme>
</gui>
After the file is updated and saved, restart the service with sudo systemctl restart [email protected]. Replace admin with the user you’re running it as. You should now be able to connect to the GUI of syncthing from another PC’s web browser by navigating to port 8384 of the Pi’s IP.
Setting up automatic updates
For these, we’ll need a bash script and a systemd service and timer. The shell script will take a folder path and the location of the python script that updates the eink display. Both of these need to be the absolute paths in the filesystem. It also has a saturation and a picture_buffer_size variable, which define the saturation value that’s used when invoking the script and a buffer, which prevents an image from appearing again for a set number of updates. This is done by appending a number to the filename and reducing it by one every time the script runs, then removing it completely when it gets to zero and only allowing the selection of new images from non-suffixed files. It is important to note that the folder must contain at least one more file than the buffer size, otherwise no updates will happen for a number of refreshes if all of the available images had been used recently. Once created with the contents below, the script needs to be made executable using sudo chmod +x <filename>.
#!/bin/bash

# these need to contain the absolute paths, starting from root '/...'
# the location of the python script that updates the eink screen
SCRIPT_LOCATION=/home/admin/Pimoroni/inky/examples/7color/image.py
# the location of the folder containing all of the pictures
PICTURES_LOCATION=/home/admin/photos
# the desired saturation of the screen, the default is 0.5
SATURATION=1
# the number of days/updates for which a picture is not displayed again
# MUST BE LESS THAN THE NUMBER OF PICTURES AVAILABLE IN THE FOLDER
PICTURE_BUFFER_SIZE=3

echo 'Updating picture...'

chosen_picture_path=''

# randomly choose an image file without an appended index
get_random_file () {
chosen_picture_path=$(ls $PICTURES_LOCATION/*.jpg |sort -R |tail -1)
}

# decrease the value of the suffixes on all images and remove them if they are 1
reduce_indices () {
for i in $(seq 0 $PICTURE_BUFFER_SIZE)
do
        for filename in $PICTURES_LOCATION/*.jpg.$i; do
                if [ -e $PICTURES_LOCATION/*.jpg.$i ]; then
                        if [ $i -lt 1 ]; then
                                picture=$filename
                                old_location=$picture
                                new_location="${old_location:0:${#old_location}-2}"
                                mv $old_location $new_location
                        else
                                picture=$filename
                                old_location=$picture
                                new_location="${old_location%.$i}.$((i-1))"
                                mv $old_location $new_location
                        fi
                fi
        done
done
}

# add a numerical suffix to the randomly selected image, like an extension
add_index () {
old_location=$chosen_picture_path
new_location="${old_location%.$i}.$PICTURE_BUFFER_SIZE"
mv $old_location $new_location
}

reduce_indices

get_random_file

echo 'The new file is '$chosen_picture_path

python $SCRIPT_LOCATION $chosen_picture_path $SATURATION

add_index
The file to create the systemd service needs to be named something like eink_update.service and has to be placed in /lib/systemd/system.
[Unit]
Description=The eInk image updater service

[Service]
Type=oneshot
User=admin
ExecStart=/home/admin/update_eink_screen.sh
Restart=never
And finally the timer to trigger the systemd service will go in the same folder with the eink_update.timer filename. They need to have the same name, as a timer will automatically be associated with the ~.service file of an identical name.
[Unit]
Description=A timer for the eInk image updater service to run it each day

[Timer]
OnCalendar=daily
Persistent=true

[Install]
WantedBy=timers.target
After these are created, just run sudo systemctl daemon-reload and then sudo systemctl enable --now eink_update.timer. Then you can list all the active timers with systemctl list-timers --all. If the eink_update.timer is there, then it shall be triggered automatically at every midnight to randomly update the picture on the screen.
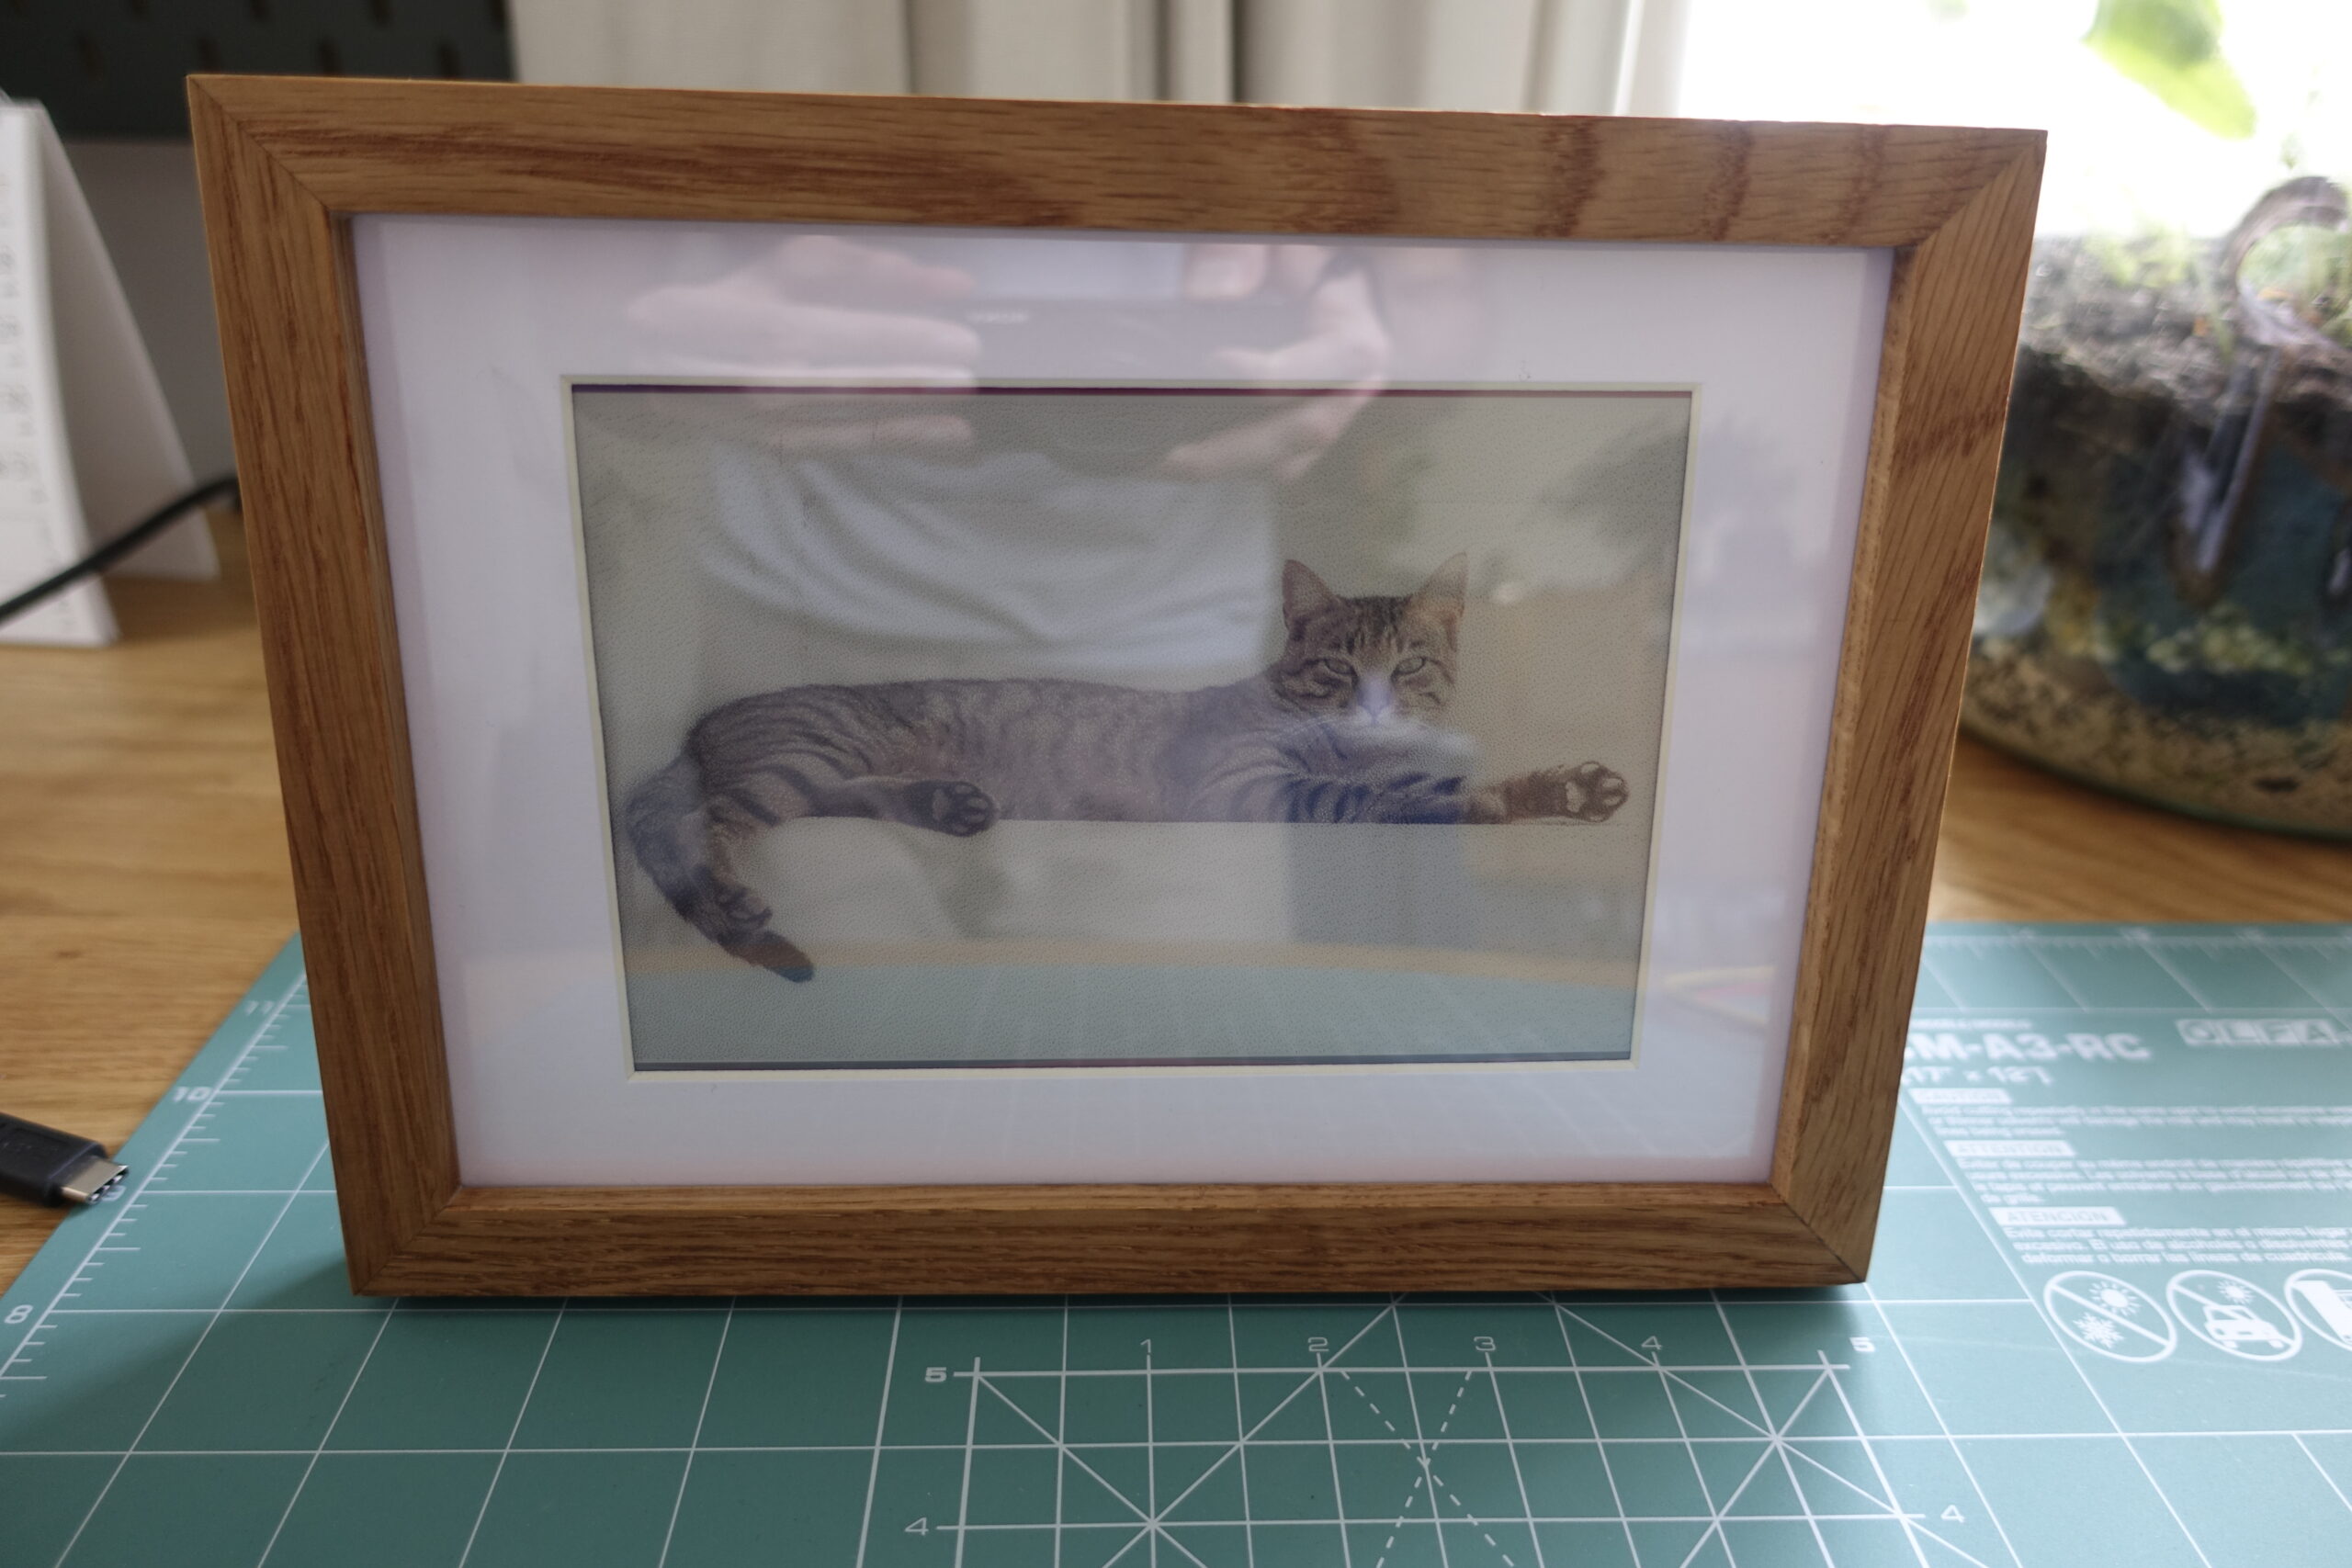
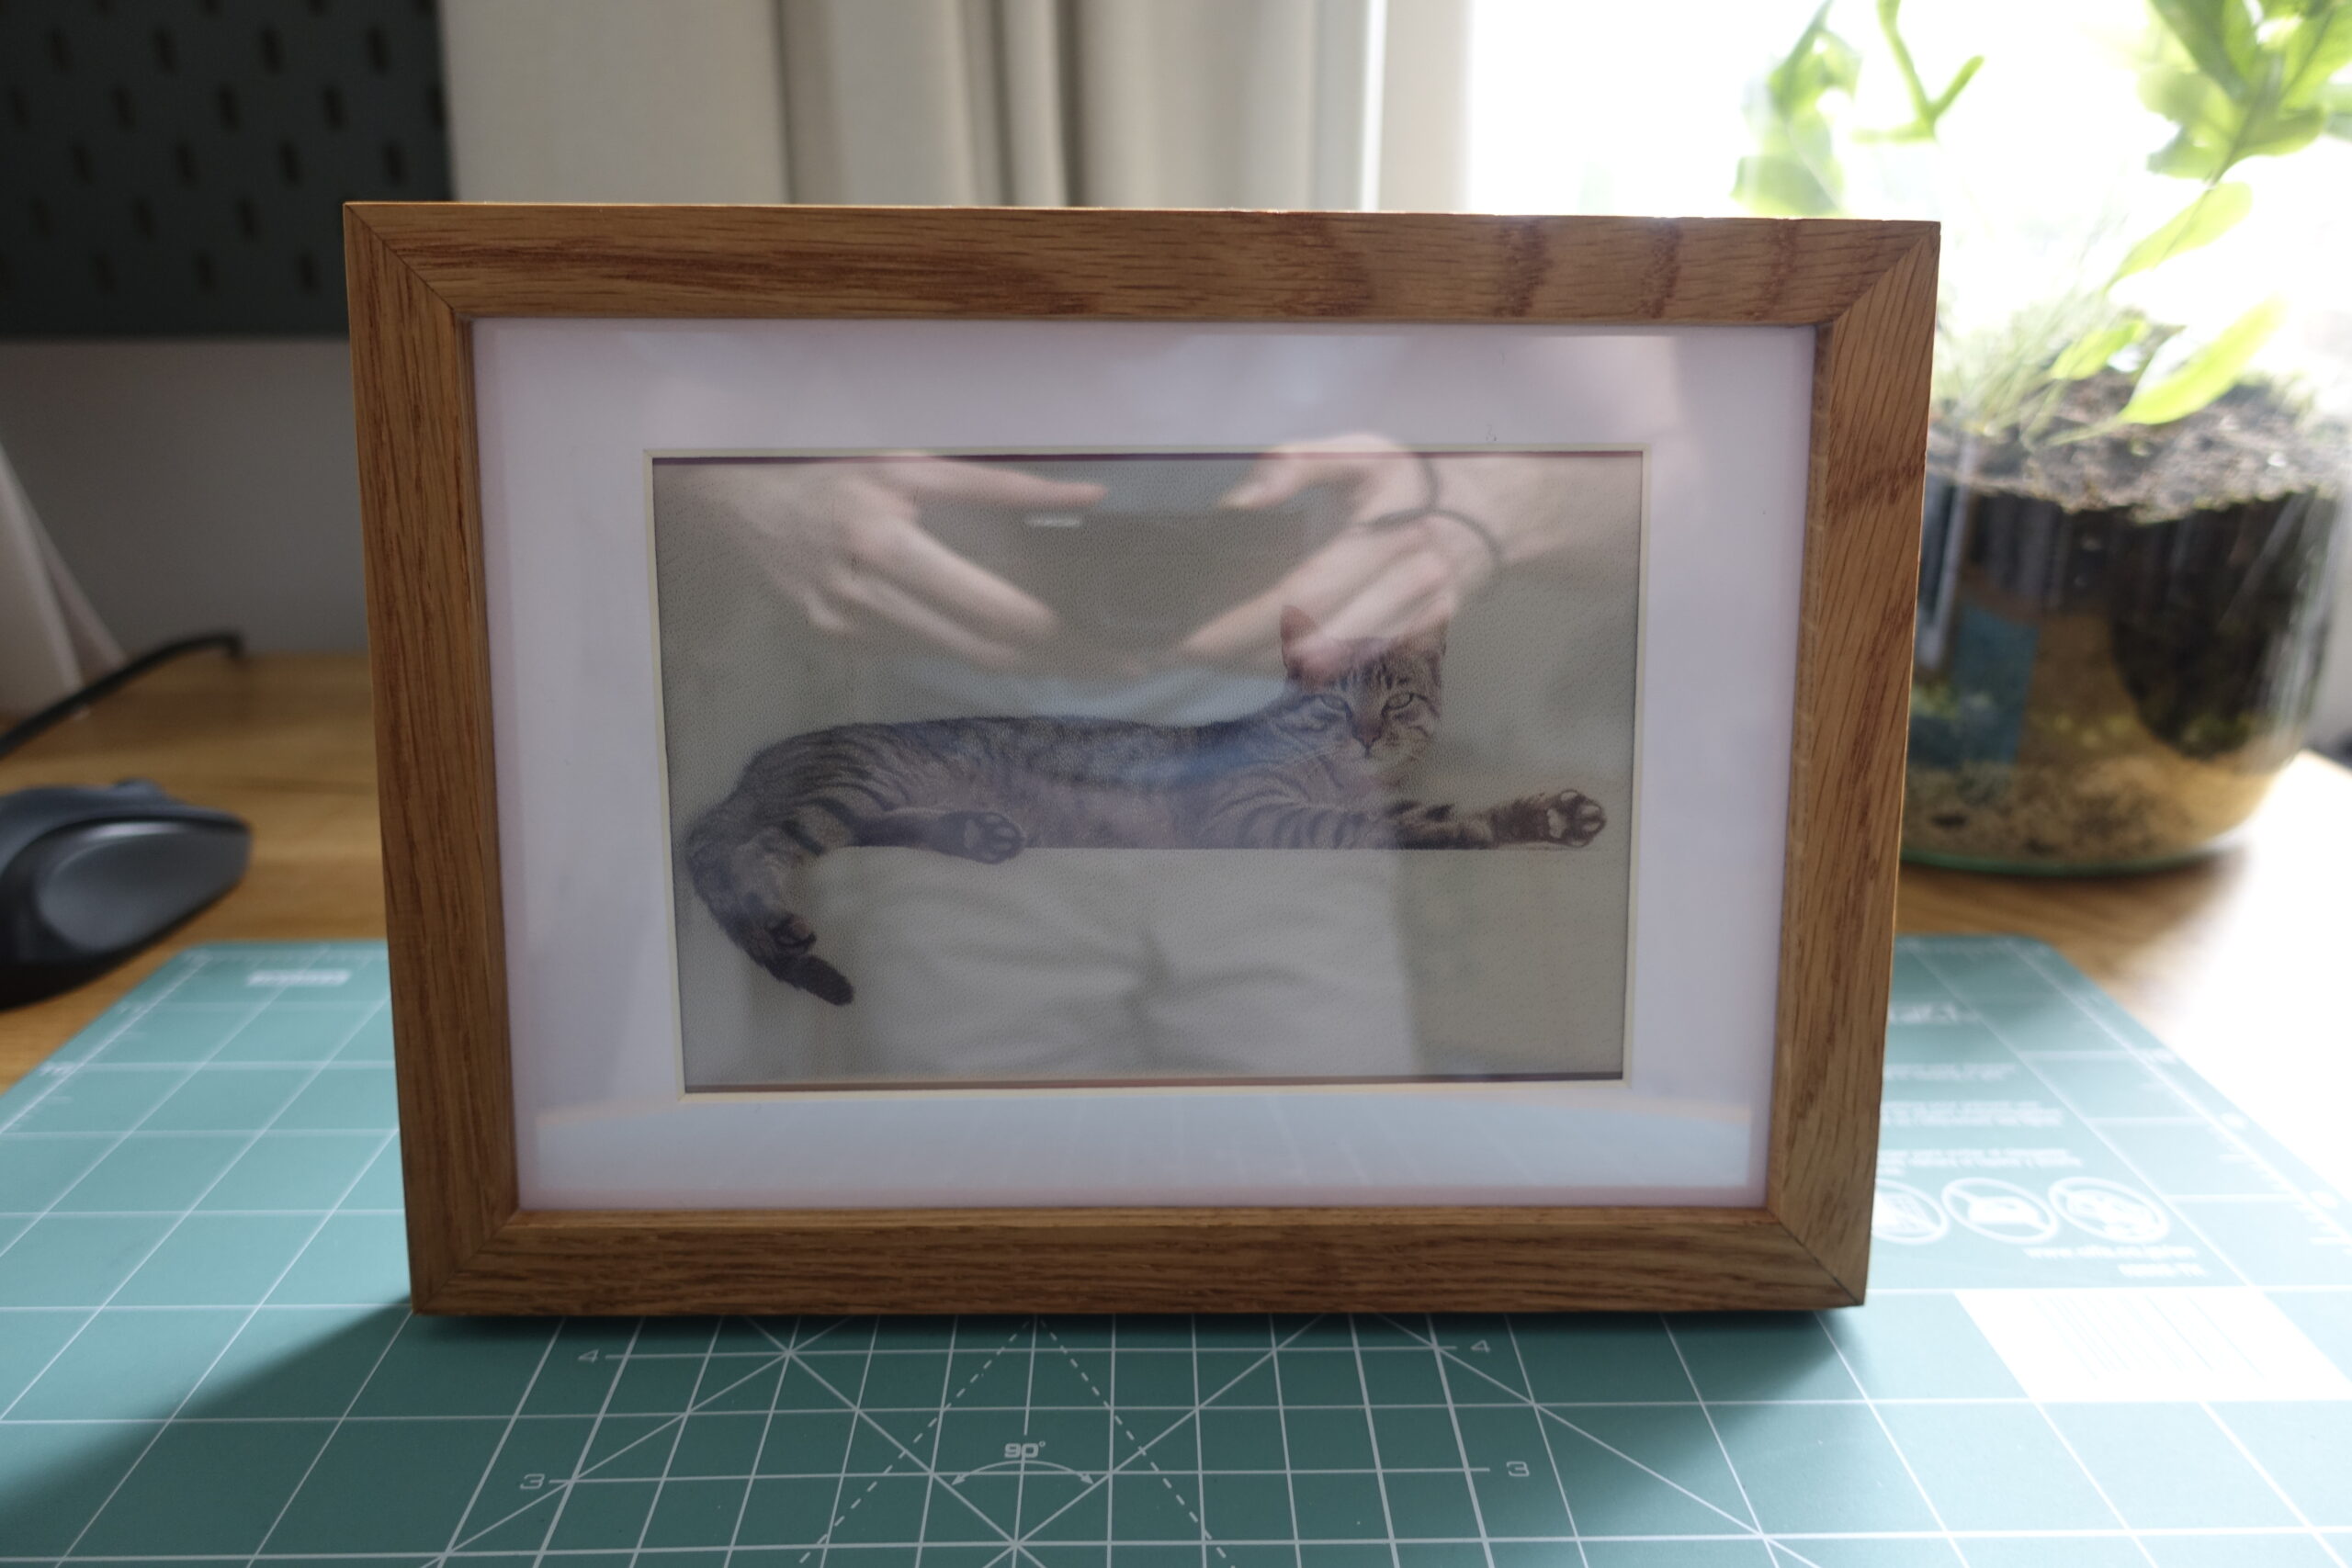
Adding a frame
Of course it wouldn’t be complete without adding a frame, so I got one from H&M UK (This is not a referral link) with a paper insert that has a 10x15cm cutout, which is almost the right size, although it’s not perfect. A custom paper insert could correct that. I used some oil to make the grains of the wood pop a bit more and give the frame a darker hue.
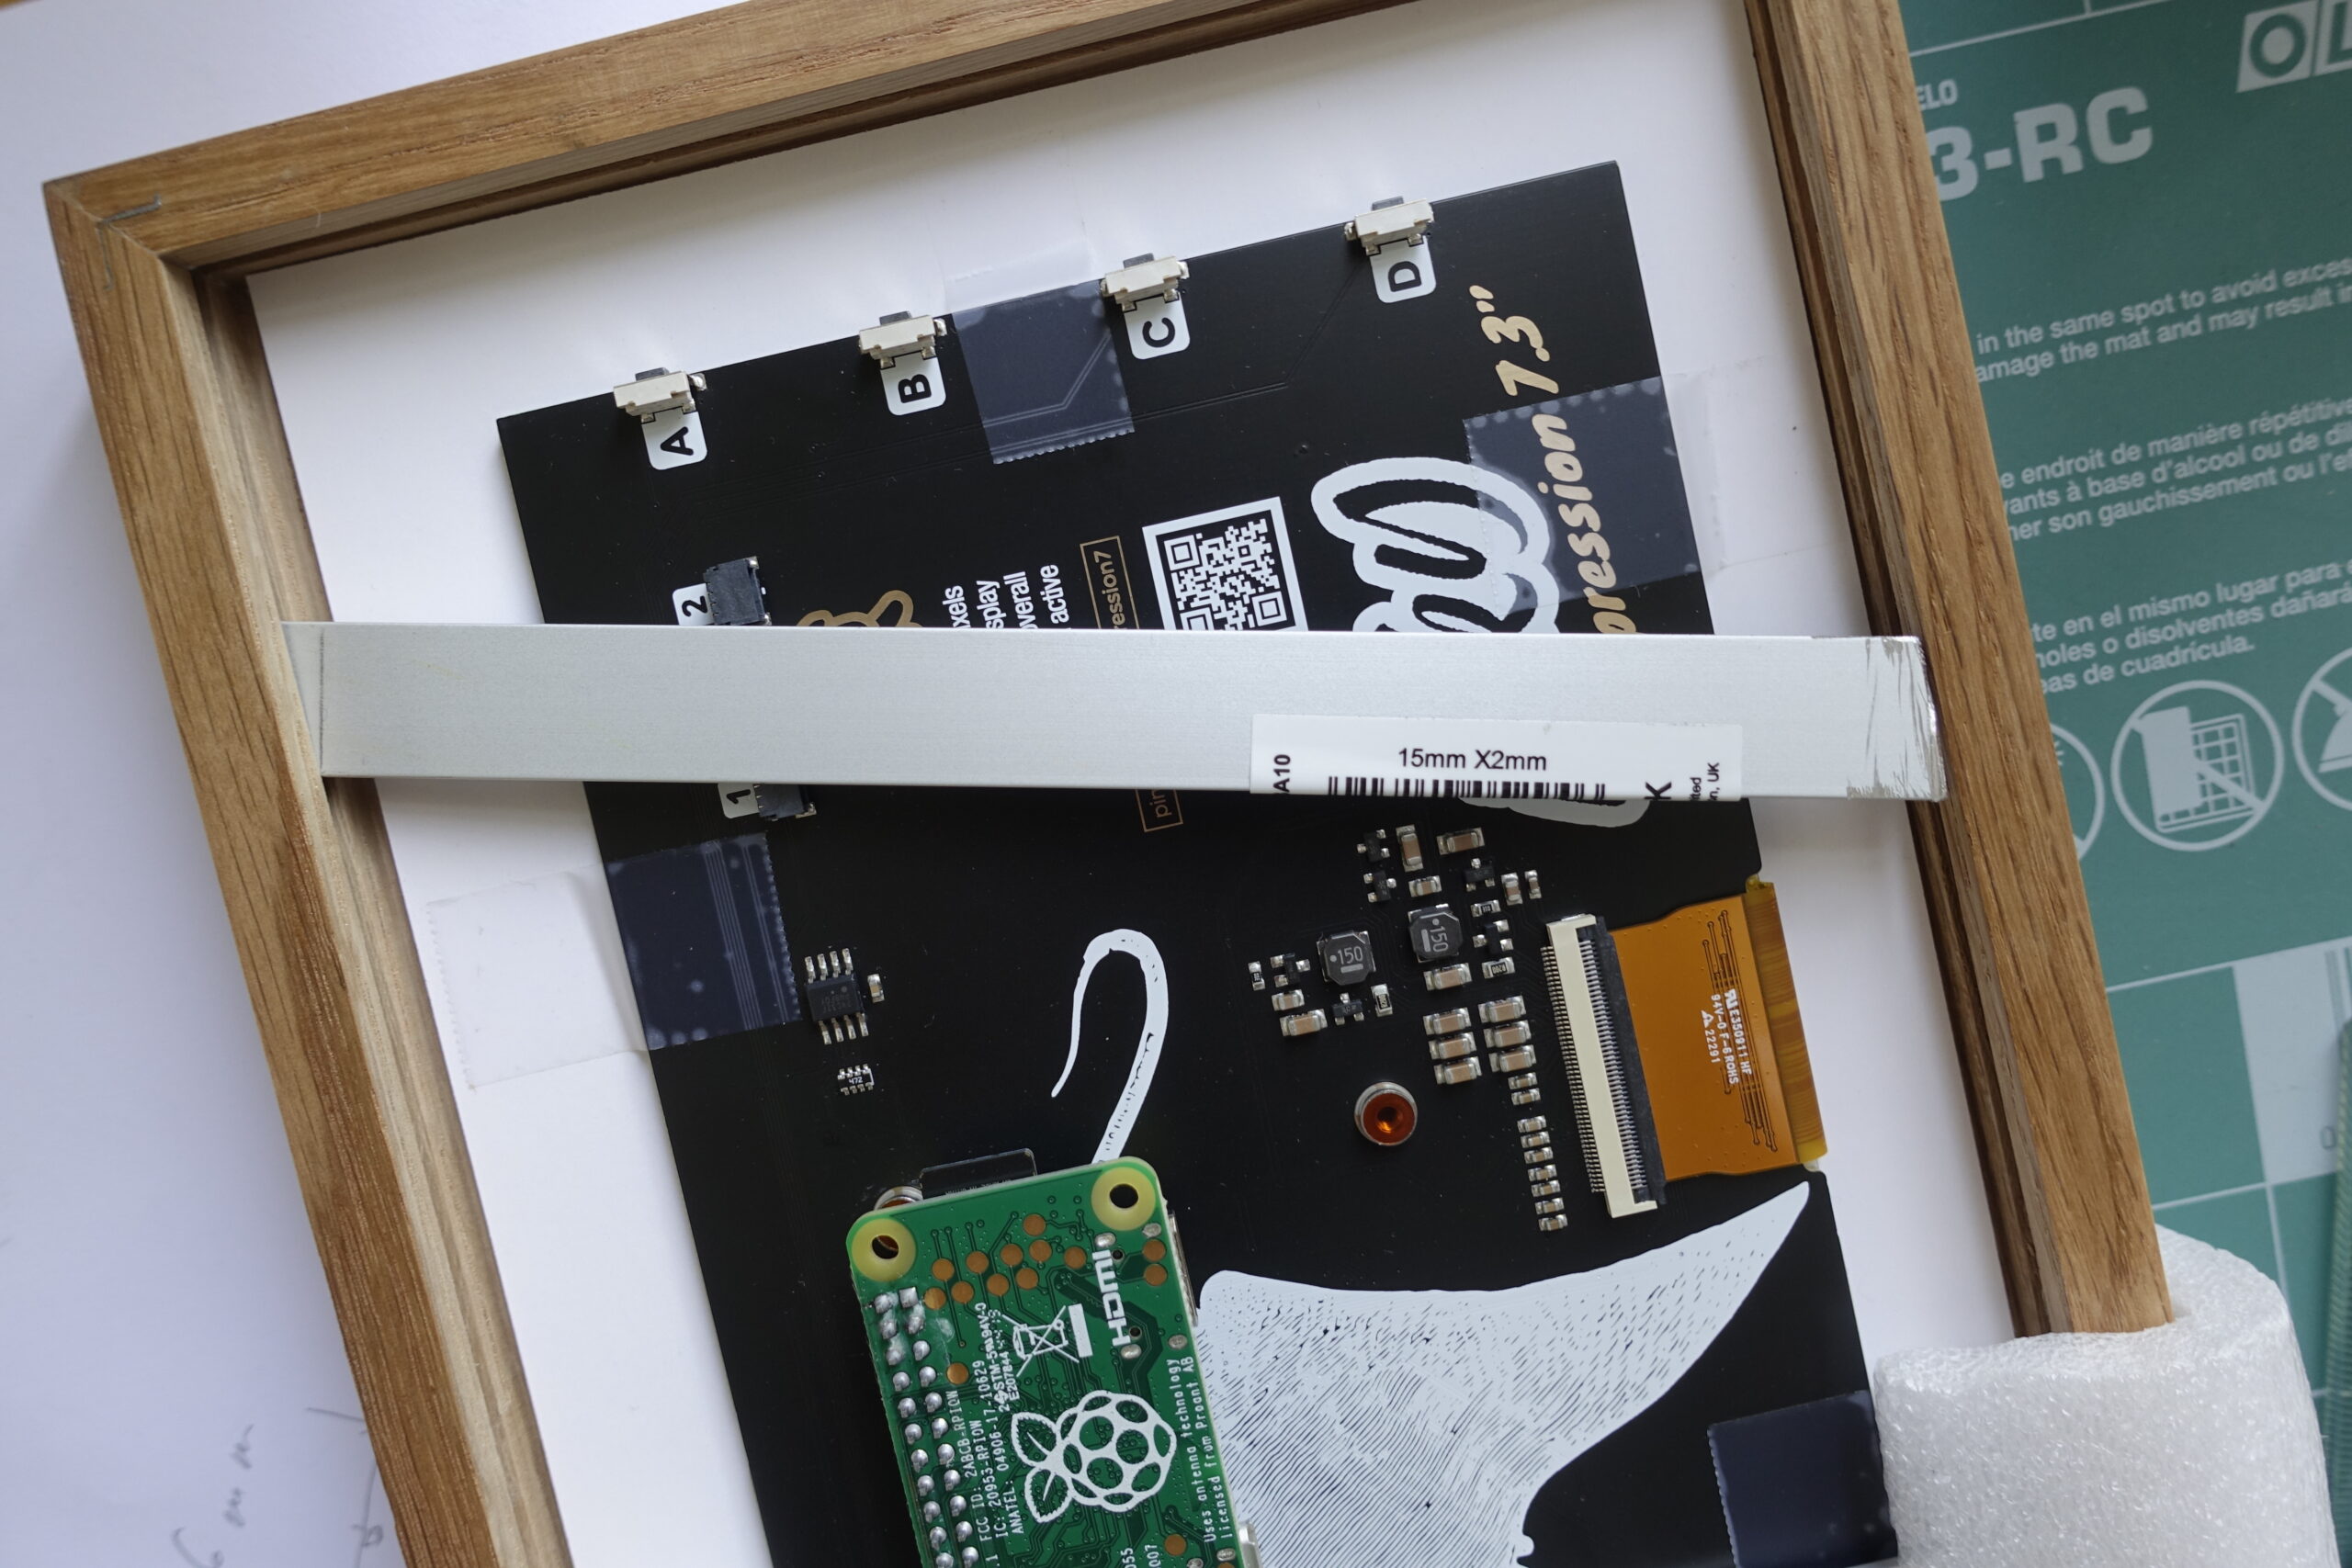
To make sure that the display stays in place, I used tape to temporarily (yes, I know it’s not going to be temporary) affix the screen to the paper insert and used pieces of a 15x2mm aluminium profile hold it in place. It’s quite easy to cut it to length with a hacksaw.
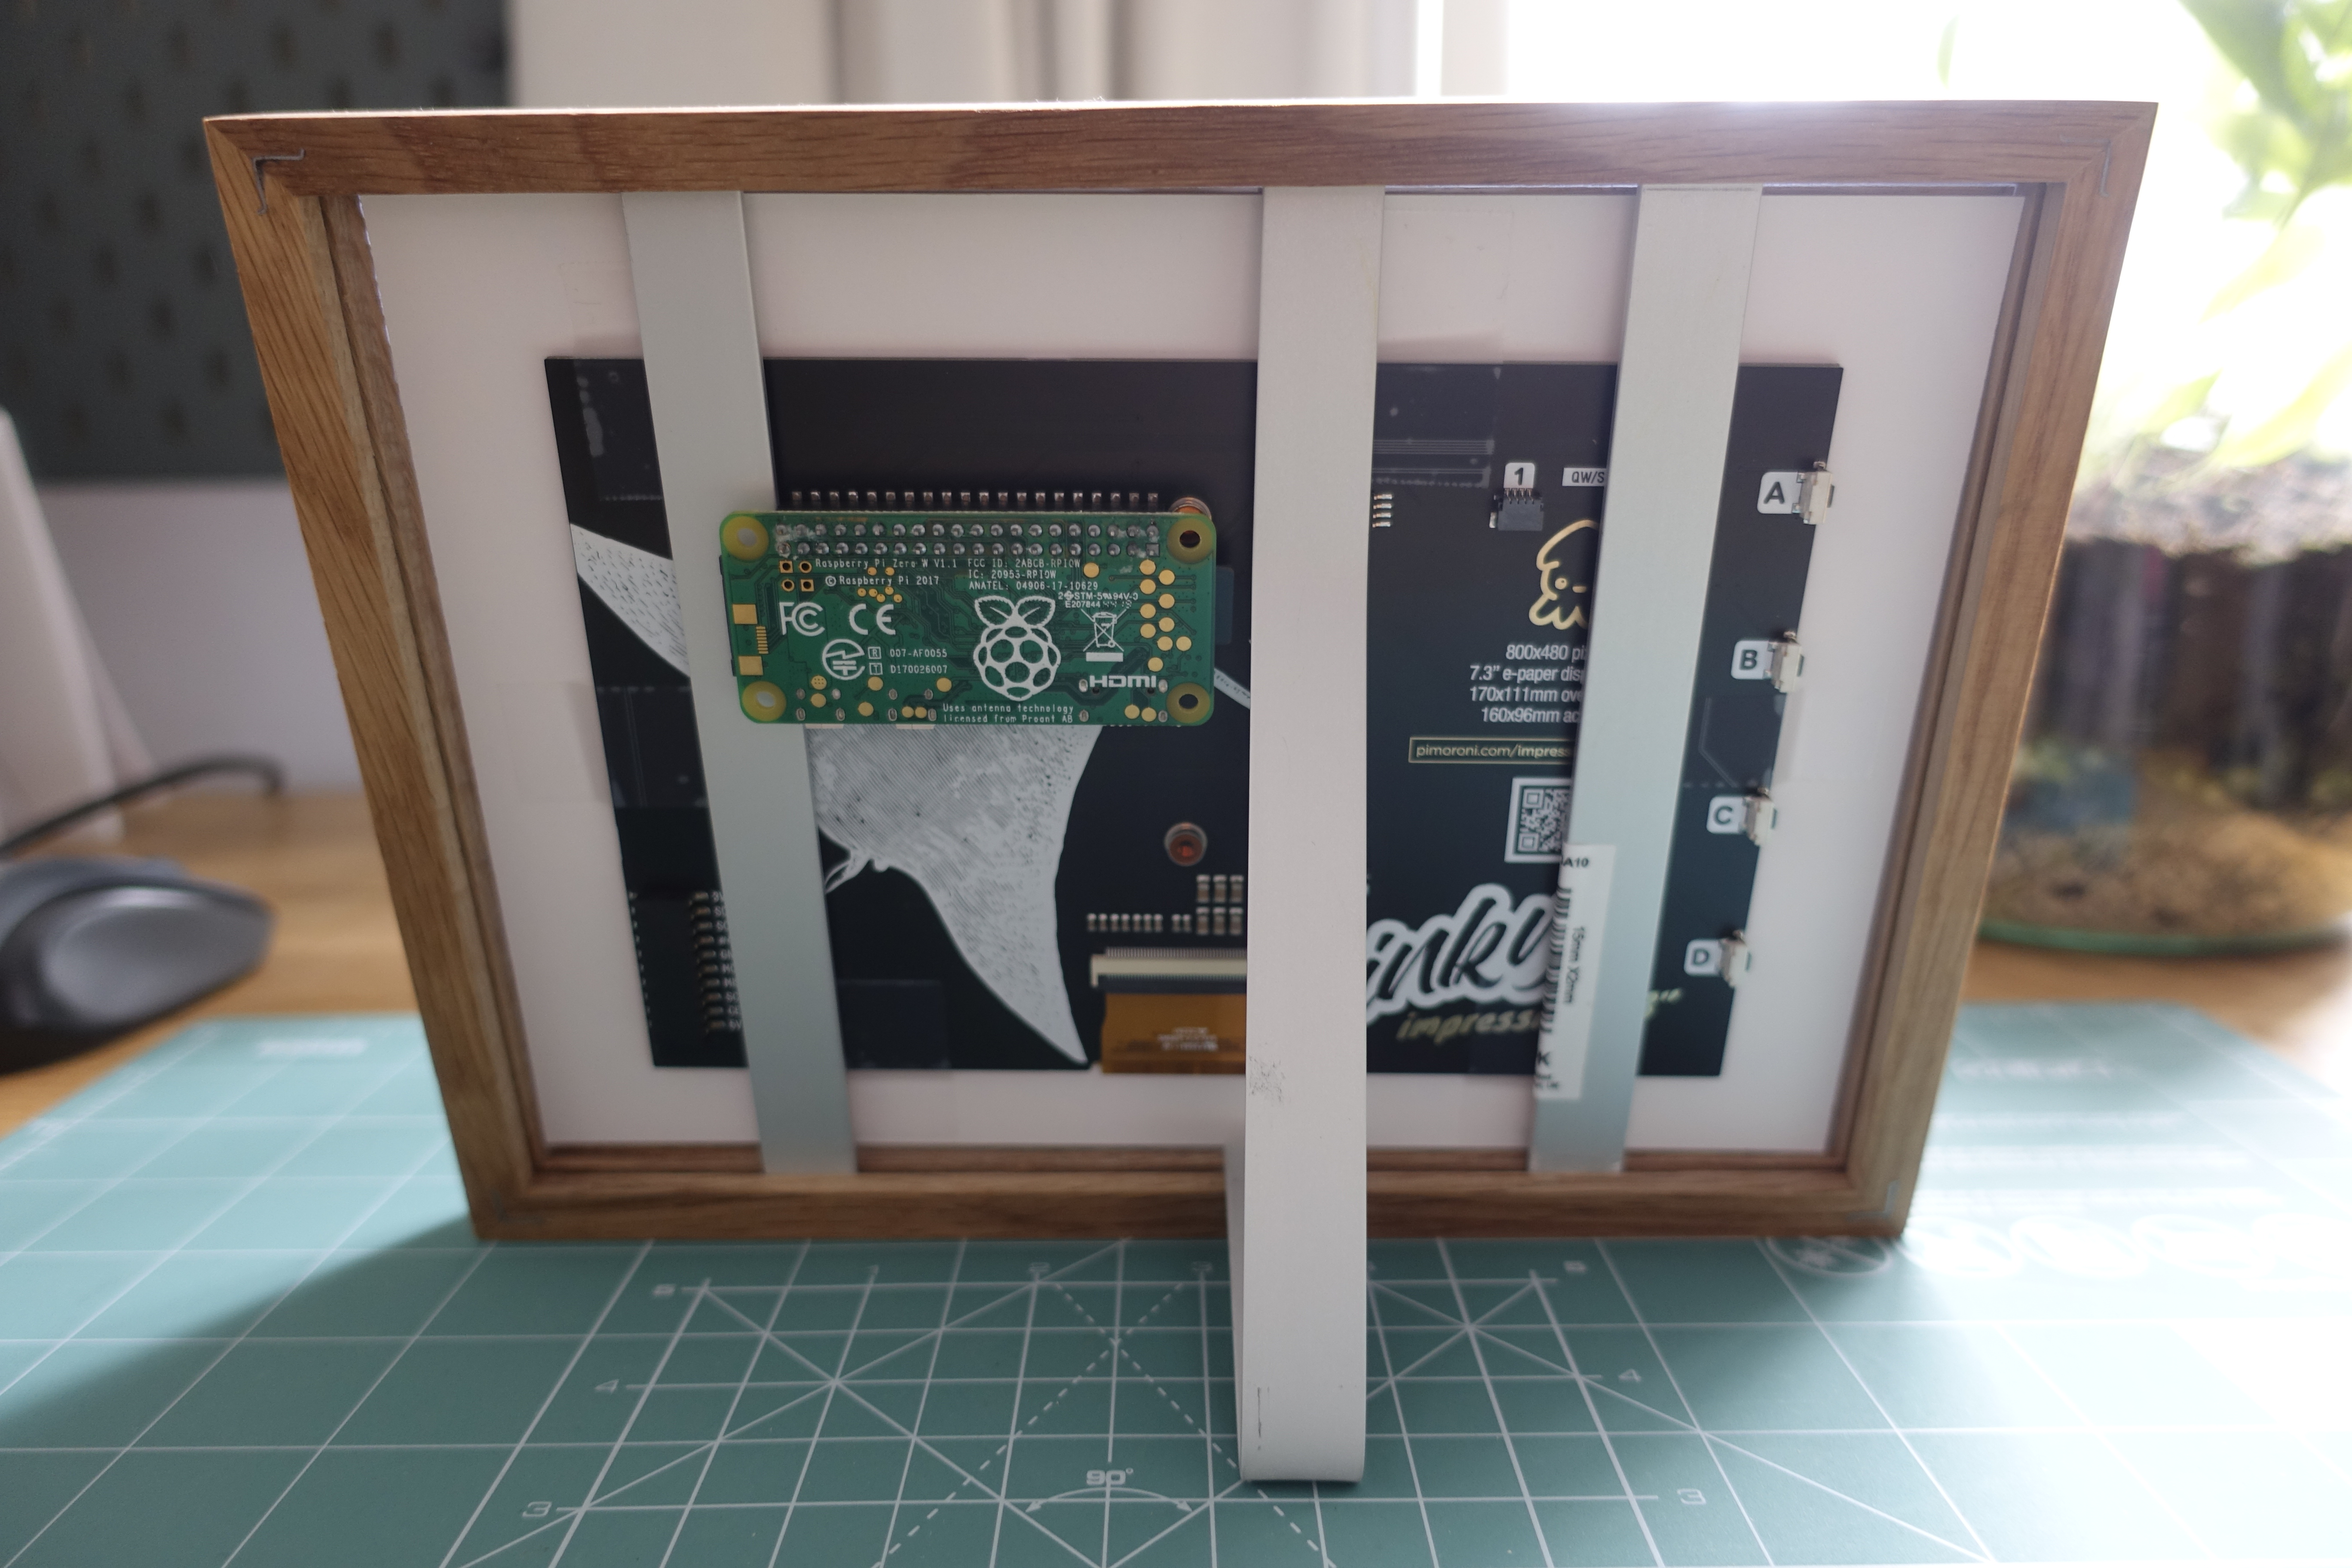
There are two pieces which hold the screen and one that functions as a stand, which is a longer piece that I bent by hand using a pair of pliers. The shorter ones have been cut off at an angle on one side to make them easier to slide in, as below.
The stand is a 25cm-long piece, bent to a shape that makes it hold the frame at a slight angle. The ends just slide into the grooves of the frame.

And that’s it. I think it looks pretty good, although the back could be improved, but it’s not particularly visible, so I don’t really mind. A battery could be added to allow completely wireless operation, but I think the PicoW variant of the screen would be more suitable for that, as that uses a lot less power.
Leave a Reply