I like music. But every time I want to listen to something it feels like too much of a hassle to fire up a computer and I often think – nah, it doesn’t worth turning on a pc for 10 minutes. So, I decided to have a peek at what sort of streaming boxes were available and I got very discouraged when I realized that what I was looking for would likely cost something in the region of £500. So, naturally, I started looking for alternatives and decided to build something myself.
Most of my music collection is on a NAS, from .mp3 to .dsd files. The latter are a bit peculiar to handle, so being able to play those wasn’t a requirement, but I did want to have the ability to play .flac files. And my girlfriend loves Spotify, so it had to be able to stream music from there too.
The other requirement was a good quality DAC. This was one of the reasons why I didn’t just get a Chromecast Audio (apart from it having been discontinued a while ago) and was looking at the more Hi-Fi oriented products.
So, after rummaging through some boxes of random computer bits, I found a low power ECS Mini PC and an Asus SupremeFX Hi-Fi USB DAC, which form the base of this project. The PC has a dual-core Atom CPU with 1GB of RAM and 4GB of eMMC storage and the USB DAC is a really decent one which fits into a 5.25″ bay, but as my current PC case doesn’t have one, it was collecting dust. I needed to power these so I’ve purchased a 240V to 12V switching mode PSU and a 12V to 5V DC-DC converter, as the DAC needs 12V and the PC runs on 5V.

The additional yellow part with the USB connector is a USB isolator which galvanically separates the device from the USB host to reduce hissing and filter out other noises from the signal. I also ended up using a different DC-DC converter from the one shown here, as this one didn’t want to play well with the 12V PSU. The new one is from Traco Power, the same brand as the 240V power supply. They are a TXM 035-112, capable of delivering 35W at 12V and a TEN 10-1211, which can output 10W at 5V for the PC.

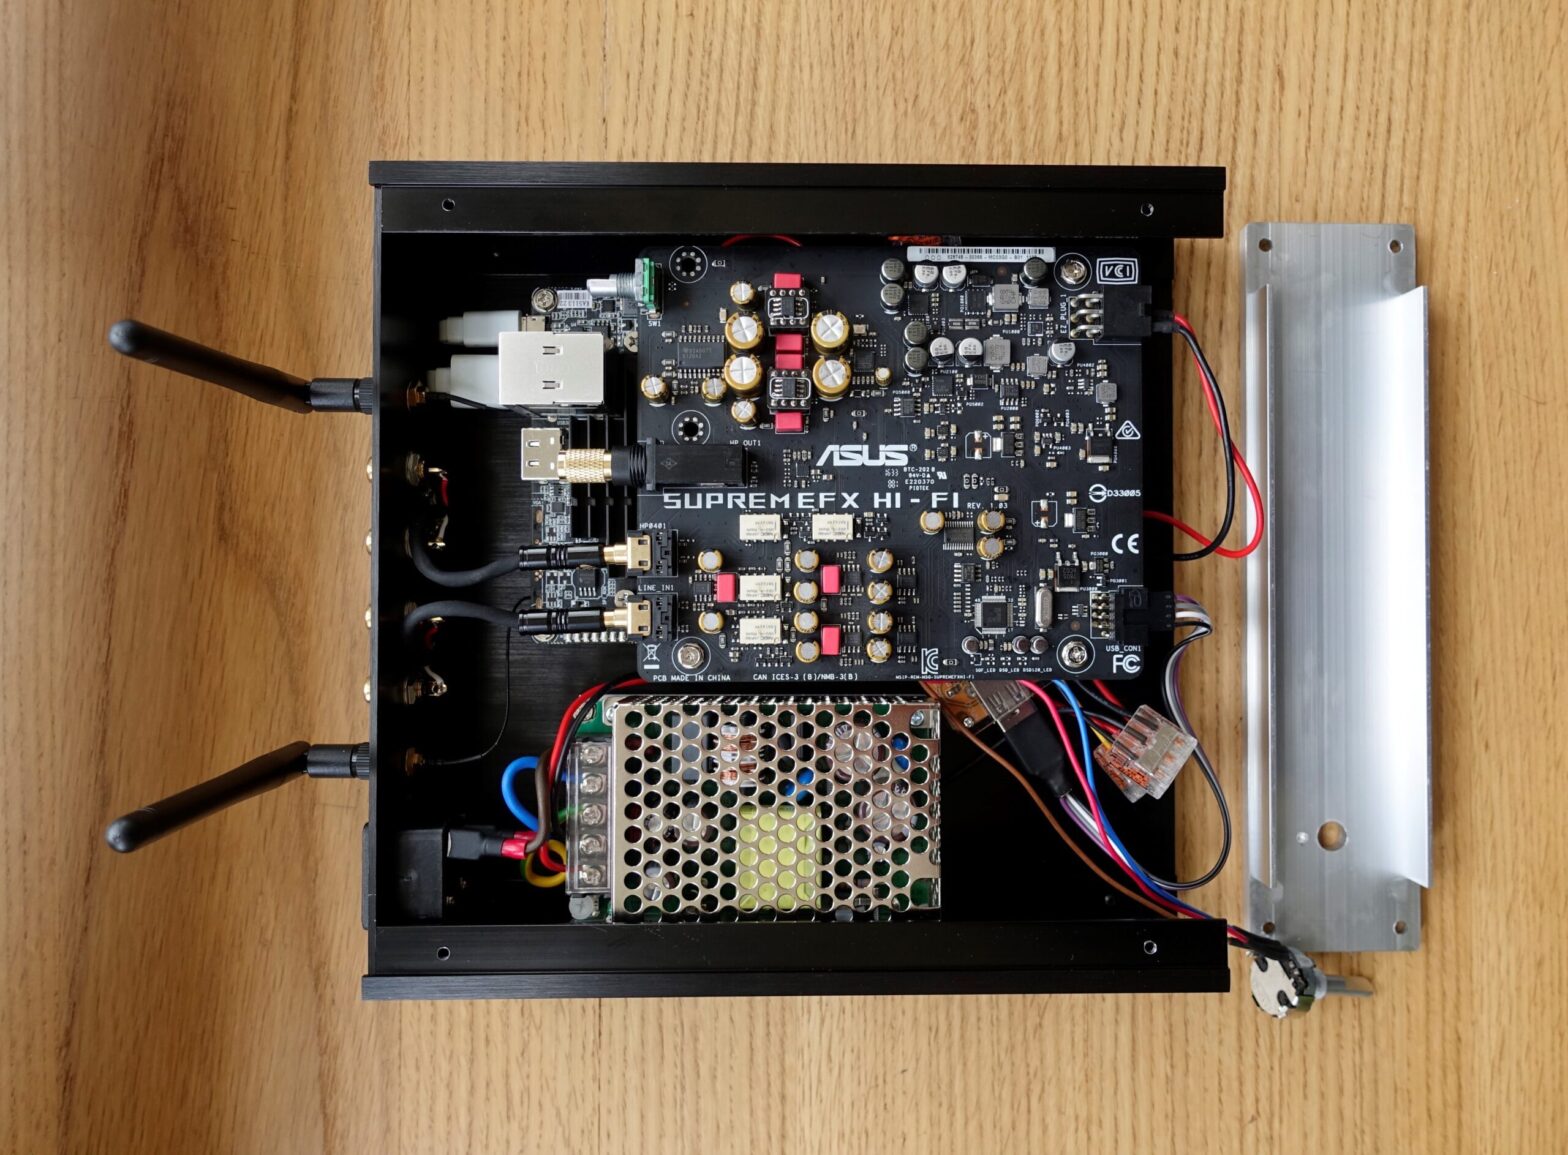
Of course, it wouldn’t be complete without an enclosure, so I had to find something that looks nice and can be customized to fit all of these components. I stumbled upon these aluminium cases on Aliexpress that were made for audio amplifiers and I thought I’d give them a go. My choice was a T-2205, which comfortably fits all of the components in the above picture. I mounted everything using brass standoffs, so all I needed to do was to drill some holes in the bottom panel, which was quite simple, as the case arrived in pieces, much like Ikea furniture.


I added a wifi card to make positioning more flexible and the RCA outputs which I mounted on the case are just soldered to 3.5mm audio jacks, which connect to the sound card. One of those is a line input which I haven’t utilized here. A rotary encoder was also installed on the front panel, as the sound card’s volume cannot be controlled by software. The DC-DC converter is not visible here, as it’s underneath the sound card.
I found it quite easy to drill the aluminium and marking the positions of the holes was done by using cellotape and a sharpie. The front panel was 5mm thick and the hole I needed for the rotary encoder was around 9mm in diameter, so I used multiple drill bits, starting at 1mm and stepping up 0.5mm at a time and also found that regular cooking oil makes a very good lubricant for drilling.

The rotary encoder was soldered to the contacts of the original one on the sound card and the cable was secured with some hot glue to keep it in place. The new rotary encoder I used is an Alps EC20A1820401 and it has an extra protruding pin in the front to prevent it from turning when the knob is rotated. I drilled a 2mm hole for that which was only around 2-3mm deep, so it didn’t go all the way through the panel.
The hardware is mostly finished at this point, so the next stage is to install an OS and set up a music player app that can be controlled remotely.

Leave a Reply